Create Git Aliases On PowerShell 7

Overview
Using aliases saves you time and helps you avoid typos. On my daily work as a developer, I have to issue git commands many times. Thanks to aliases, I can avoid many mistakes when typing commands.
On Linux/Mac, it is super easy to create aliases with your bashrc/zhsrc file. However, you need extra work on Windows to use aliases.
In this post, I’m going to show you how you can create and save aliases on Windows Powershell.
Create Git Aliases on Windows
The first step is to open powershell as administrator:
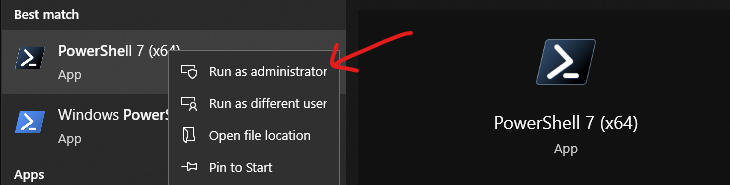
Open PowerShell as Admin
Next, in the new PowerShell window, type:
notepad $PSHOME\Profile.ps1Probably you don’t have this file created yet. Notepad windows will open and asks you to create the file. Say yes.
Now put the following content to the file and save:
# New-Alias -Name gh -Value Get-Help
function Get-GitStatus { & git status $args }
New-Alias -Name s -Value Get-GitStatus

function Set-GitCommit { & git commit -m $args }
New-Alias -Name c -Value Set-GitCommit

function Get-GitLog{ & git log $args }
New-Alias -Name l -Value Get-GitLog

function Get-GitAdd{ & git add $args }
New-Alias -Name a -Value Get-GitAdd

function Get-GitCheckout{ & git checkout $args }
New-Alias -Name co -Value Get-GitCheckout

function Get-GitDiff{ & git diff $args }
New-Alias -Name d -Value Get-GitDiff

function Get-GitReset{ & git reset $args }
New-Alias -Name rs -Value Get-GitReset
To create one alias, you need two lines as above. One is to declare a function and the other is to set the alias for that function.
The file is my personal settings, you can change the aliases to your liking.
Save the file and open a new PowerShell session, you can use the aliases now.
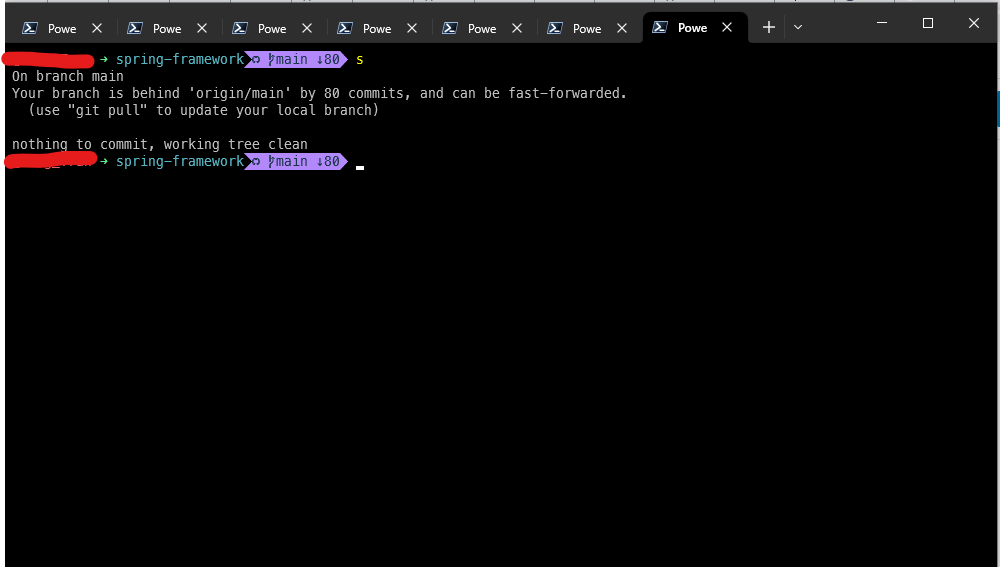
Using the git status alias on powershell
Conclusion
Creating and saving aliases on Windows PowerShell requires extra effort. However, once created, you can use them as you do on Linux/Mac