How To Generate CA and Self-Signed SSL Certificate For Your Website
Overview
There are times you need to generate a self-signed certificate for your website. One example is for websites in a development environment.
My story is recently, I need to set up a Keycloak instance on the internet. Recent versions of Keycloak require HTTPS to log in to admin.
In this post, I’m going to show you how to:
- Generate CA (Certificate Authority) certificate
- Use the CA to generate a self-signed certificate for any website
- Bonus: Import the certificate so it will be trusted on your machine (No red HTTPS)
Let’s get started.
Generate Root CA certificate
First of all, you need openssl for this to work. Either a Mac or ubuntu machine is OK.
If you are not on Windows, install an Ubuntu VM.
First, generate the private key for your CA:
openssl genrsa -aes256 -out cakey.pem 4096You will be prompted to enter the passphrase. Make sure to store this passphrase somewhere. You will need it later:
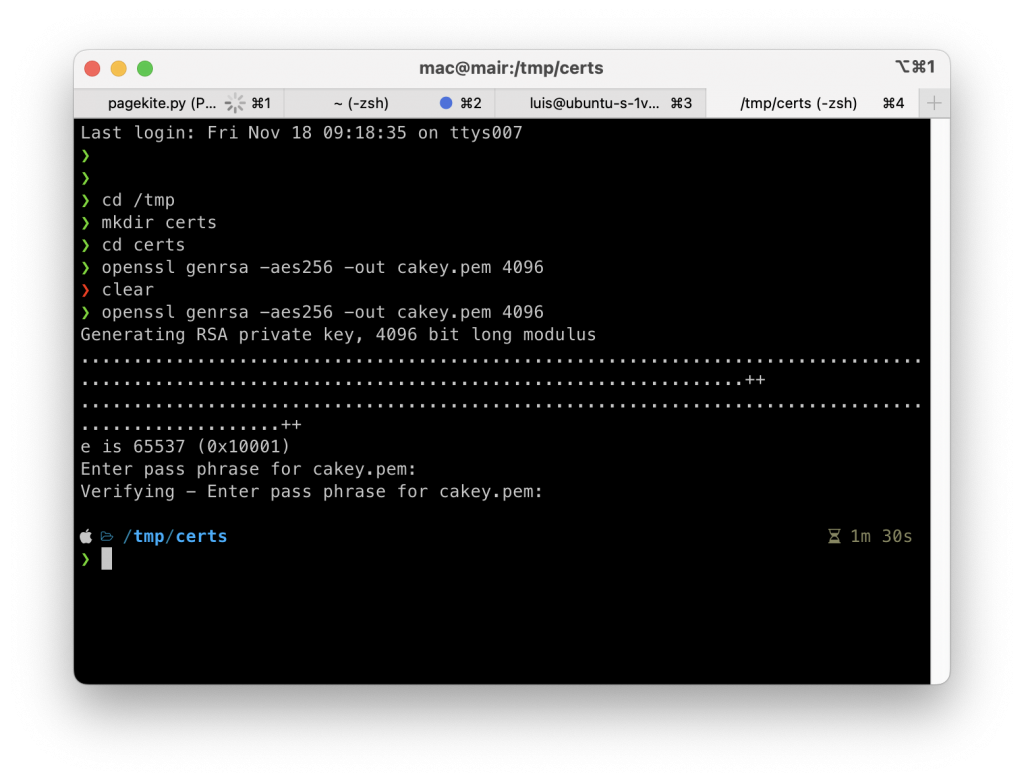
Generate the CA’s private key
The next step is to generate the CA’s certificate
You can use the following command to generate the CA certificate:
openssl req -new -x509 -key cakey.pem -out cacert.pem -days 3650Make sure you are in the same directory as the cakey.pem file you generated before. If you store the cakey.pem file in a different place, make sure to update the page.
The command above generates the certificate that expires in 10 years.
You will be asked for the passphrase (the one you used to generate the key). Enter that to complete the certificate generation:
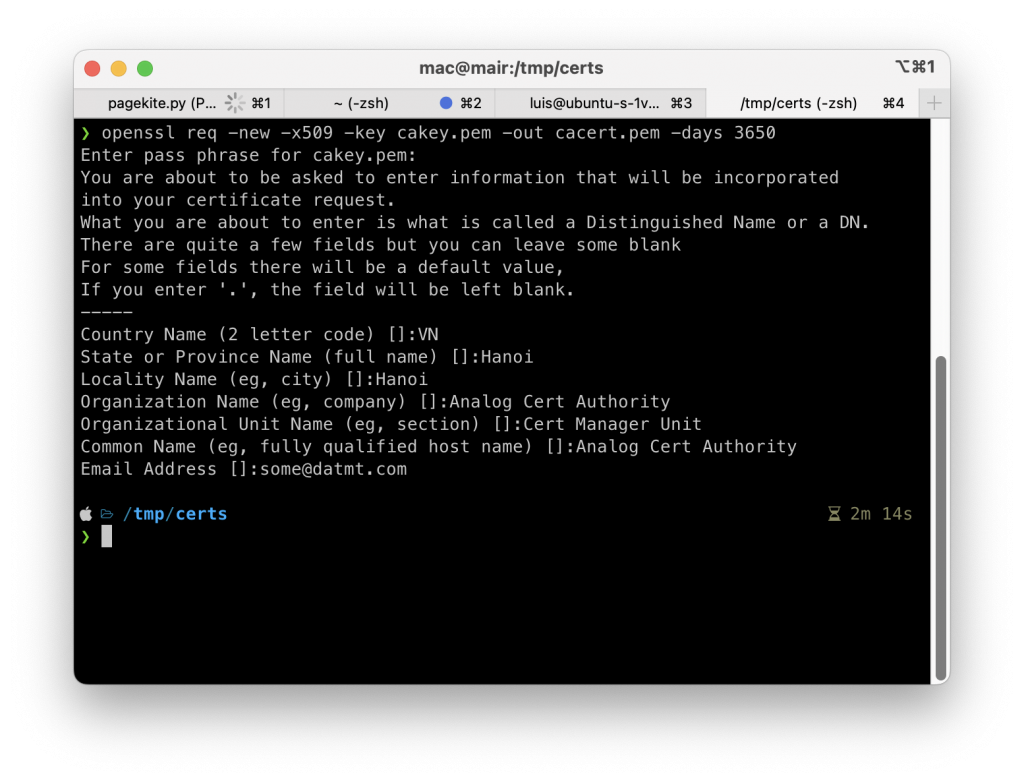
Generate the Certificate Authority Certificate
As you can see, along with the passphrase, you also need to enter some additional details. Remember, this is not the SSL certificate for your website but just the CA.
You don’t need to enter any domain here.
Now we are done with the CA. Let’s generate the certificate for the website.
Generate Website SSL Certificate From the CA Certificate
The first step is to generate the Certificate Signing Request (CSR).
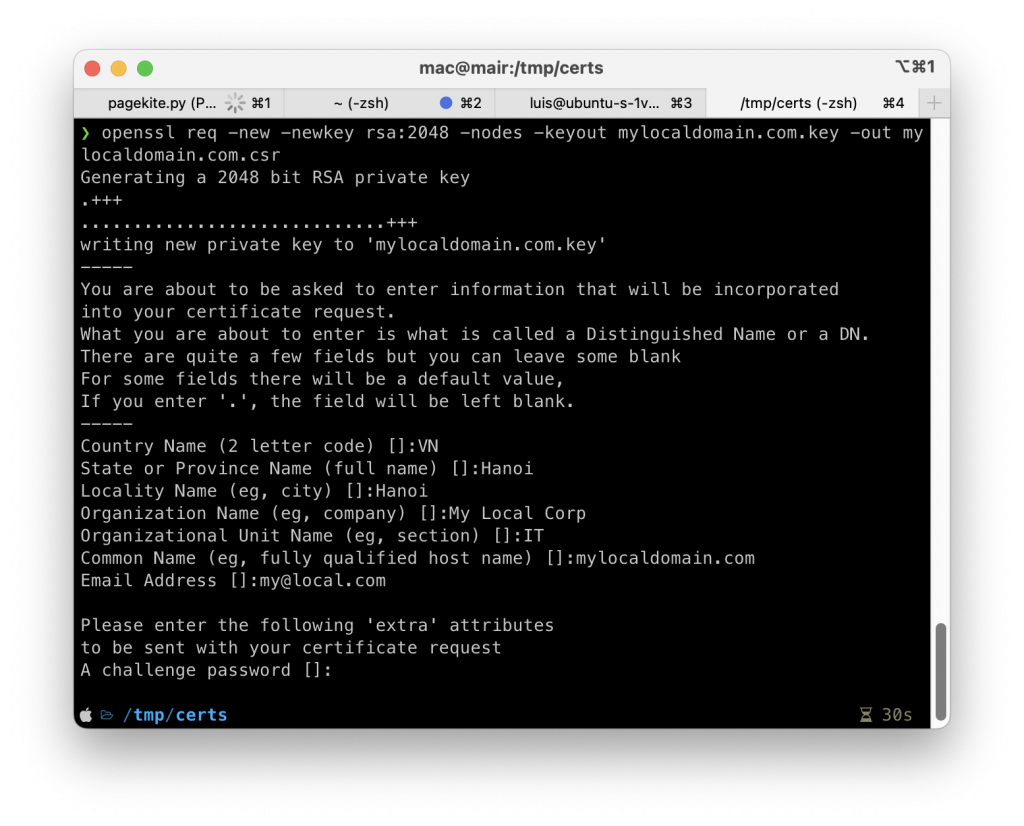
The following command will generate the CSR for your domain and also the private key:
openssl req -new -newkey rsa:2048 -nodes -keyout mylocaldomain.com.key -out mylocaldomain.com.csrYou can replace mylocaldomain.com with anything. The file name doesn’t matter.
Then, you will be prompted to enter the details of the request. This is quite similar to when you generate the CA certificate above. However, you need to enter the domain name in this step:
Generate a private key and CSR for your domain
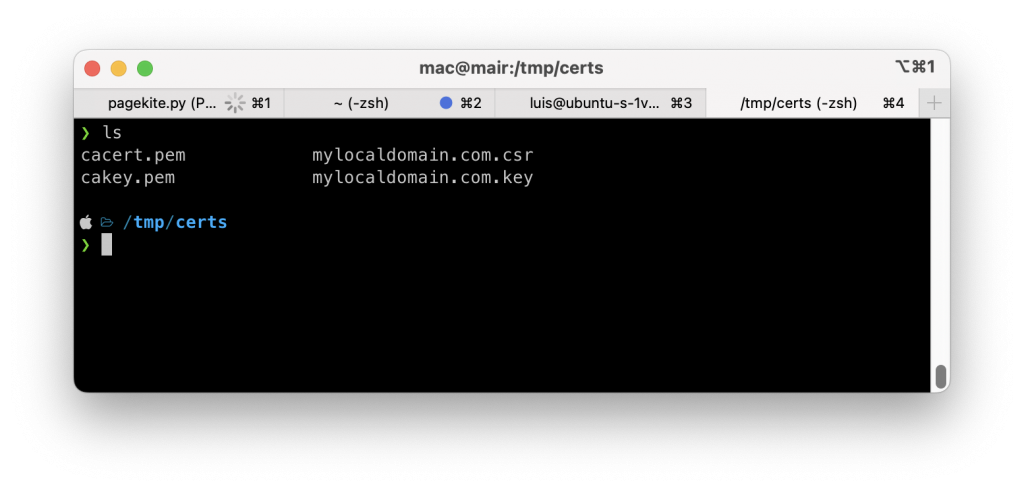
You will see that there are two new files created:
CSR and private key genearte
The final step is to use the CA certificate to approve the CSR and generate the certificate for the domain.
However, before that, you will need to prepare a file with the following content:
authorityKeyIdentifier=keyid,issuer
basicConstraints=CA:FALSE
keyUsage = digitalSignature, nonRepudiation, keyEncipherment, dataEncipherment
subjectAltName = @alt_names

[alt_names]
DNS.1 = mylocaldomain.com
Make sure you update the line number 7 with your own domain name.
Save the file with any name you want. I will save it as ext1
Now, run the following command to generate the certificate to the domain name:
openssl x509 -req -in mylocaldomain.com.csr -sha256 -extfile ext1 -days 365 -CA cacert.pem -CAkey cakey.pem -CAcreateserial -out mylocaldomain.com.pemAs you can see in the command there are references to the CA’s key and cert. Make sure you update these references to the correct location (if needed).
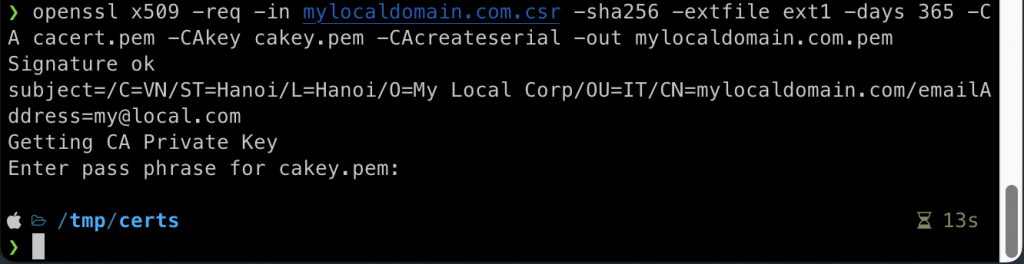
Generate SSL certificate for the domain
Now you have generated the needed certificates for the CA and the domain name. The next step is to import the CA certificate to the trusted store so you can fix the red HTTPS in the browser.
Import the CA certificate to the trusted store
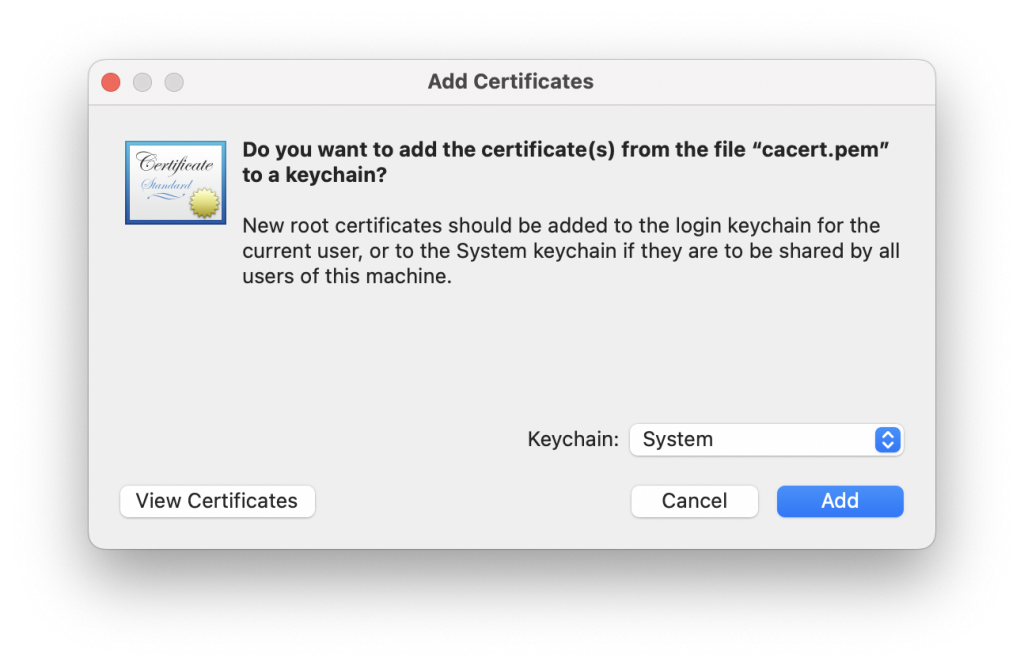
On Mac or Windows, you can simply click on the cert to import.
Import the CA Certificate on Mac
After you double click on the cacert.pem file, a new window will open.
Import the CA cert to Mac
Click on Add to import the cert.
Now you are done.
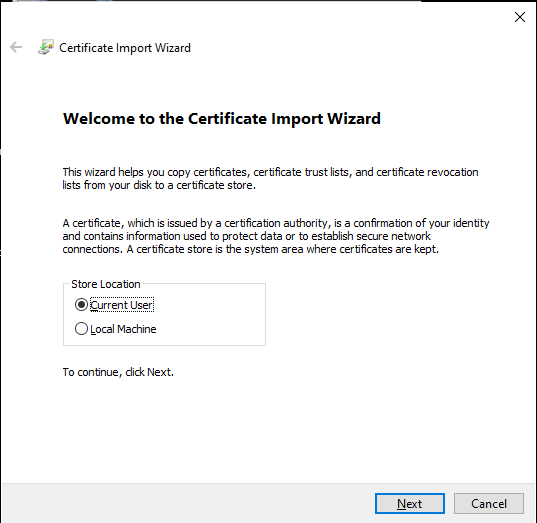
Import the CA cert on Windows
On Windows, you need to rename the cacert.pem file to carcert.crt file then simply double click and import as follow:
Import CA certificate on Windows
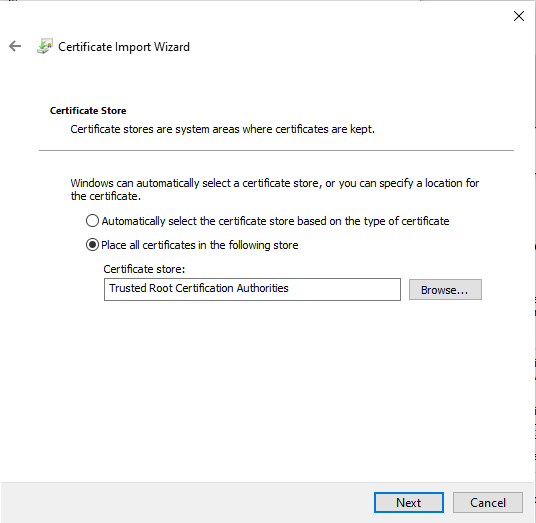
Select the correct store for the CA Cert
Conclusion
In this post, I’ve shown you how to create a Certificate Authority (CA) and use the CA’s cert to sign a CSR from any domain you like. Self-signed certificates are ideal for development environments. After creating the self-signed certificates, you also need to configure them in your webserver. I will have more tutorials for configuring self-signed certificates for your server in the future.