Table of Contents
Overview
Spring Boot 3 came out with a lot of promises. The most prominent thing is the native image build. I currently deploy my apps as a fat jar in containers with JRE and it took around 20s to boot up. Thus, I would love to try the native build to see if is there any improvement.
However, when I start adding Keycloak, things got bad. Many Keycloak’s libraries are not usable in Spring Boot 3 resulting me spending a whole morning to settle this.
So, here is how I managed to integrate Keycloak with Spring Boot 3. Hope this helps you save some precious time.
One word of caution, I use the spring boot app as a backend for an angular app. Thus, there is no form login or authorization code flow with the spring boot app.
Configure Security Config
Here is the security config you need to have in your spring boot app:
@EnableMethodSecurity
@EnableWebSecurity
@Component
class SecurityConfig  {


    @Bean
    protected SessionAuthenticationStrategy sessionAuthenticationStrategy() {
        return new NullAuthenticatedSessionStrategy();
    }

    @Bean
    public JwtAuthenticationConverter jwtAuthenticationConverter() {
        JwtGrantedAuthoritiesConverter grantedAuthoritiesConverter = new JwtGrantedAuthoritiesConverter();
        grantedAuthoritiesConverter.setAuthorityPrefix("ROLE_");
        grantedAuthoritiesConverter.setAuthoritiesClaimName("roles");
        JwtAuthenticationConverter jwtAuthenticationConverter = new JwtAuthenticationConverter();
        jwtAuthenticationConverter.setJwtGrantedAuthoritiesConverter(grantedAuthoritiesConverter);
        return jwtAuthenticationConverter;
    }

    @Bean
    public SecurityFilterChain securityFilterChain(HttpSecurity http) throws Exception {

        http.
                csrf().disable().
                authorizeHttpRequests()
                .requestMatchers("/public/**", "/swagger-ui/**", "/v3/api-docs/**", "/hook/**", "/**/swagger.json").permitAll()
                .requestMatchers("/admin/**").hasRole( "admin")
                .requestMatchers("/maker/**").hasRole("maker")
                .requestMatchers("/taker/**").hasRole("taker")
                .requestMatchers("/member/**").authenticated()
                .anyRequest().permitAll()
                .and()
                .sessionManagement()
                .sessionCreationPolicy(SessionCreationPolicy.STATELESS)
                .and()
                .oauth2ResourceServer()
                .jwt();
        return http.build();
    }


}
That’s all you need for security config.
Next, let’s configure the keycloak settings in application.yml
Configure application.yml
server:
  port: 8788

spring:
  mvc:
    pathmatch:
      matching-strategy: ant_path_matcher
  data:
    mongodb:
      host: ${MONGO_HOST}
      port: ${MONGO_PORT}
      database: ${MONGO_DB}
      username: ${MONGO_USER}
      password: ${MONGO_PASSWORD}
      authentication-database: admin
  security:
    oauth2:
      resourceserver:
        jwt:
          jwk-set-uri: ${KEYCLOAK_URL}/realms/${KEYCLOAK_REALM}/protocol/openid-connect/certs
          issuer-uri: ${KEYCLOAK_URL}/realms/${KEYCLOAK_REALM}

logging:
  level:
    org.springframework.security: trace
I use MongoDB for my app. However, the whole thing related to Keycloak is from line 16 to 21. Replace KEYCLOAK_URL and KEYCLOAK_REALM with your own settings. Here are mine:
KEYCLOAK_REALM=ukata
KEYCLOAK_URL=http://localhost:18080/auth
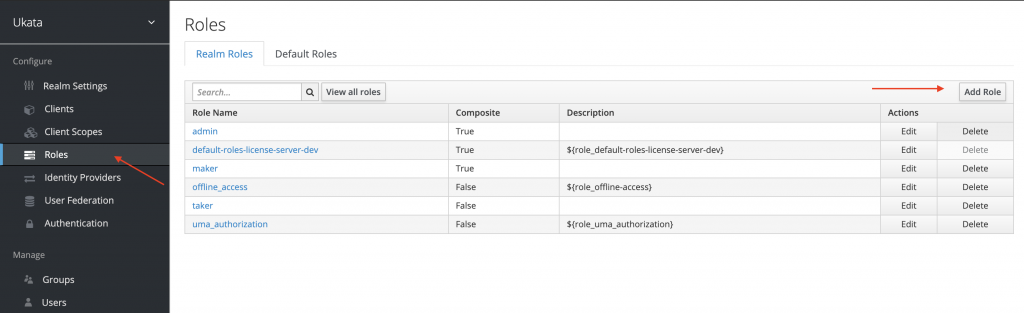
Configure Roles for your users
As you can see from my application, there are three roles:
- admin
- maker
- taker
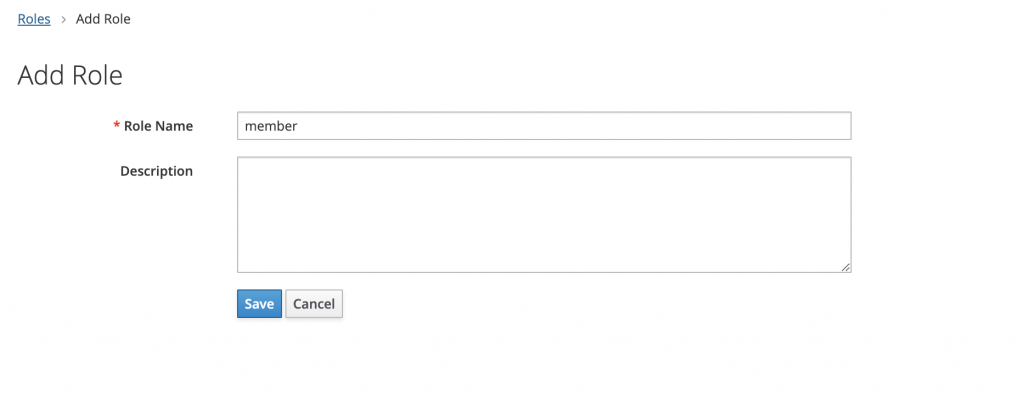
You can configure them in keycloak as realm role.
Next, you need to configure in Keycloak to show the user’s role in the token.
Add roles claim to your keycloak access token
To add your roles claim to user’s access token, you go to Client Scopes and click on roles:
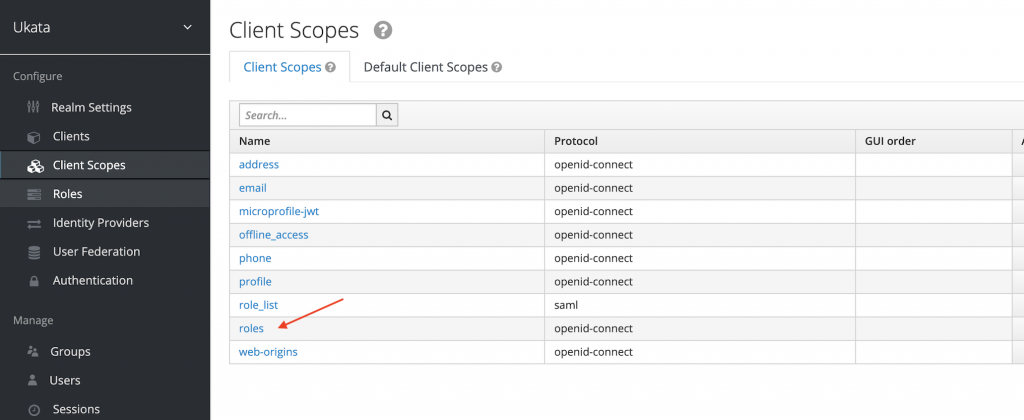
Next, go to the mappers tab and click on create new mapper like this:

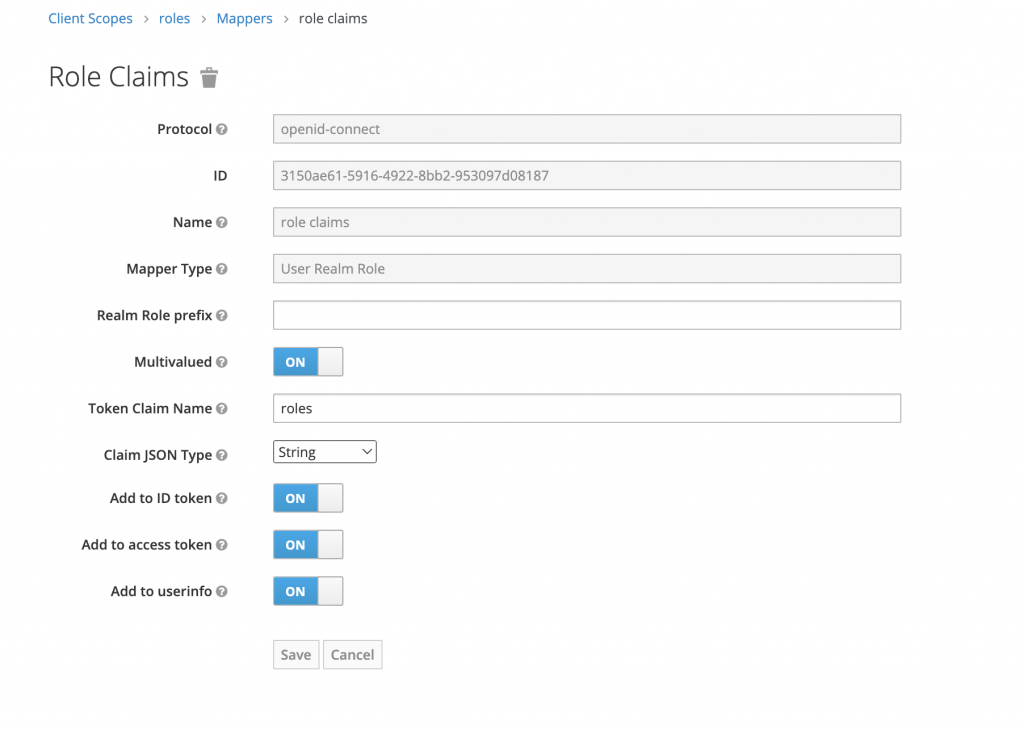
Save the mapper then the role claims will automatically display on your user’s access token (if they have role assigned to them).
Testing the application
I’ve created some endpoints that are accessible to certain users. According to the following configurations in the SecurityConfig:
    @Bean
    public SecurityFilterChain securityFilterChain(HttpSecurity http) throws Exception {

        http.
                csrf().disable().
                authorizeHttpRequests()
                .requestMatchers("/public/**", "/swagger-ui/**", "/v3/api-docs/**", "/hook/**", "/**/swagger.json").permitAll()
                .requestMatchers("/admin/**").hasRole( "admin")
                .requestMatchers("/maker/**").hasRole("maker")
                .requestMatchers("/taker/**").hasRole("taker")
                .requestMatchers("/member/**").authenticated()
                .anyRequest().permitAll()
                .and()
                .sessionManagement()
                .sessionCreationPolicy(SessionCreationPolicy.STATELESS)
                .and()
                .oauth2ResourceServer()
                .jwt();
        return http.build();
The path begins with/taker can only access my people with taker role and so forth.
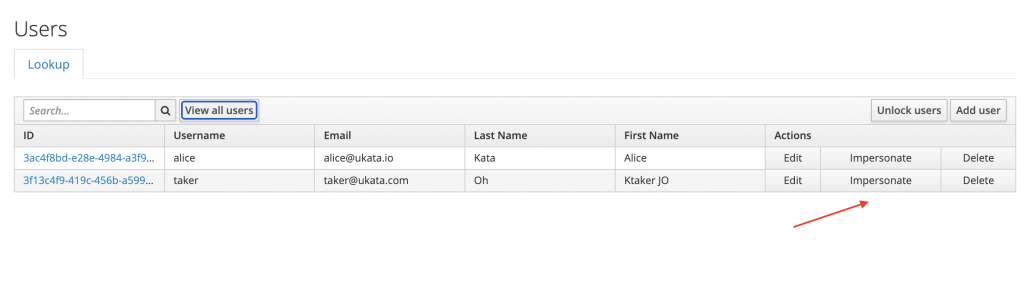
Now, let’s generate a token for user with that role and try to access the endpoint for taker:
On the next tab, open the developer tools to get the token:
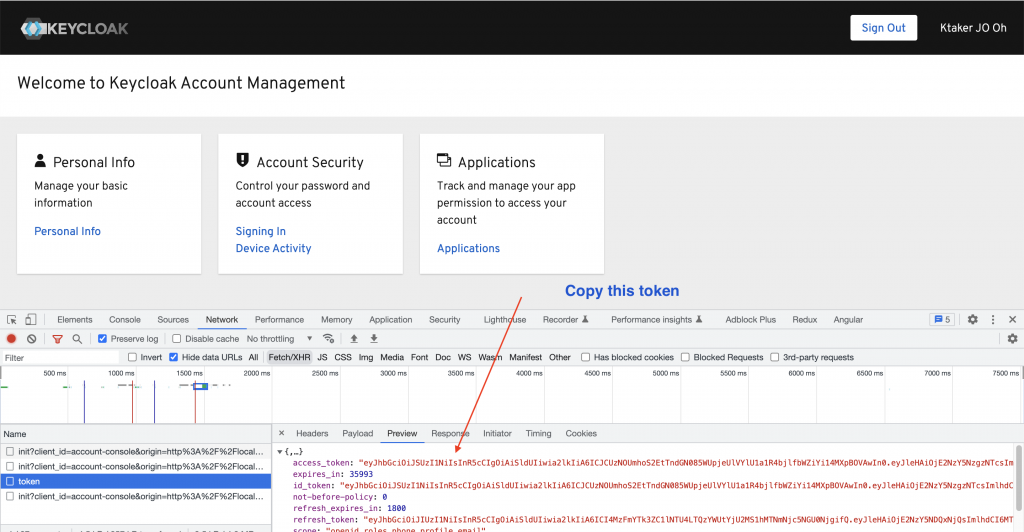
Now, you can use this token to perform the request to the endpoints:
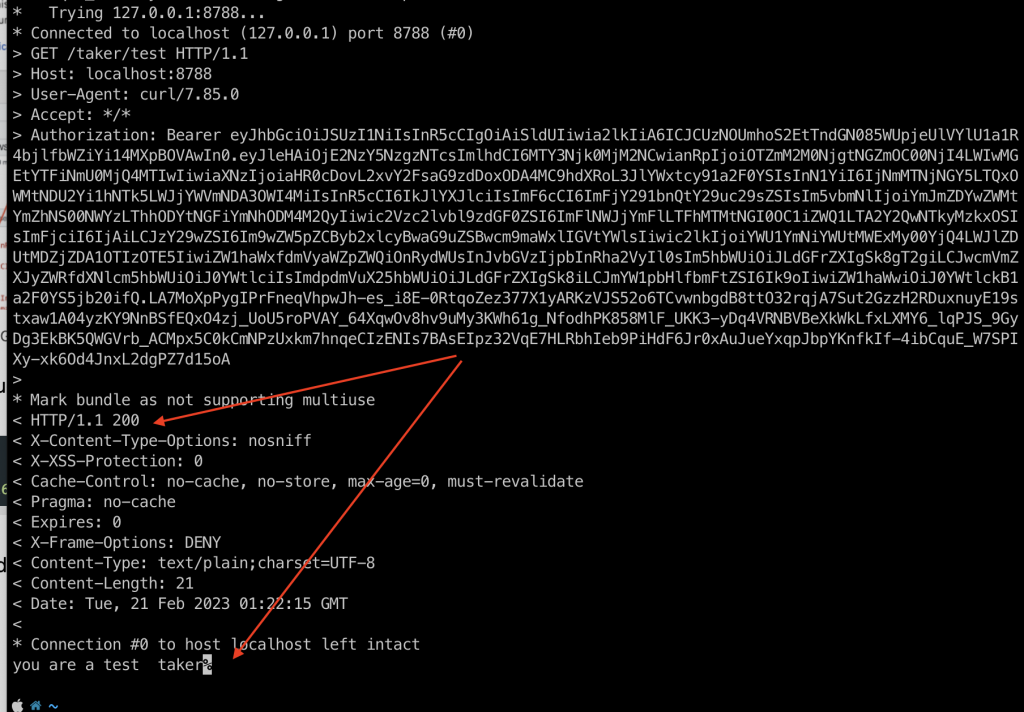
curl -vvv -H 'Authorization: Bearer eyJhbGciOiJSUzI1NiIsInR5cCIgOiAiSldUIiwia2lkIiA6ICJCUzNOUmhoS2EtTndGN085WUpjeUlVYlU1a1R4bjlfbWZiYi14MXpBOVAwIn0.eyJleHAiOjE2NzY5NzgzNTcsImlhdCI6MTY3Njk0MjM2NCwianRpIjoiOTZmM2M0NjgtNGZmOC00NjI4LWIwMGEtYTFiNmU0MjQ4MTIwIiwiaXNzIjoiaHR0cDovL2xvY2FsaG9zdDoxODA4MC9hdXRoL3JlYWxtcy91a2F0YSIsInN1YiI6IjNmMTNjNGY5LTQxOWMtNDU2Yi1hNTk5LWJjYWVmNDA3OWI4MiIsInR5cCI6IkJlYXJlciIsImF6cCI6ImFjY291bnQtY29uc29sZSIsIm5vbmNlIjoiYmJmZDYwZWMtYmZhNS00NWYzLThhODYtNGFiYmNhODM4M2QyIiwic2Vzc2lvbl9zdGF0ZSI6ImFlNWJjYmFlLTFhMTMtNGI0OC1iZWQ1LTA2Y2QwNTkyMzkxOSIsImFjciI6IjAiLCJzY29wZSI6Im9wZW5pZCByb2xlcyBwaG9uZSBwcm9maWxlIGVtYWlsIiwic2lkIjoiYWU1YmNiYWUtMWExMy00YjQ4LWJlZDUtMDZjZDA1OTIzOTE5IiwiZW1haWxfdmVyaWZpZWQiOnRydWUsInJvbGVzIjpbInRha2VyIl0sIm5hbWUiOiJLdGFrZXIgSk8gT2giLCJwcmVmZXJyZWRfdXNlcm5hbWUiOiJ0YWtlciIsImdpdmVuX25hbWUiOiJLdGFrZXIgSk8iLCJmYW1pbHlfbmFtZSI6Ik9oIiwiZW1haWwiOiJ0YWtlckB1a2F0YS5jb20ifQ.LA7MoXpPygIPrFneqVhpwJh-es_i8E-0RtqoZez377X1yARKzVJS52o6TCvwnbgdB8ttO32rqjA7Sut2GzzH2RDuxnuyE19stxaw1A04yzKY9NnBSfEQxO4zj_UoU5roPVAY_64XqwOv8hv9uMy3KWh61g_NfodhPK858MlF_UKK3-yDq4VRNBVBeXkWkLfxLXMY6_lqPJS_9GyDg3EkBK5QWGVrb_ACMpx5C0kCmNPzUxkm7hnqeCIzENIs7BAsEIpz32VqE7HLRbhIeb9PiHdF6Jr0xAuJueYxqpJbpYKnfkIf-4ibCquE_W7SPIXy-xk6Od4JnxL2dgPZ7d15oA" http://localhost:8788/taker/test
Here I use curl but you can use Postman instead.
Sure enough, the request was successful:
Conclusion
In this post, I’ve shown you how to integrate Keycloak with Spring Boot 3. The code for this post is available on GitHub.

I build softwares that solve problems. I also love writing/documenting things I learn/want to learn.