Create Quarkus Project Under 5 Minutes With Live Reloading
Creating Quarkus project is quite simple. You can get started in just a few minutes. In this post, I’m going to show you how you can do that.
My assumption is you have maven installed. If you don’t, please follow the guide to install it here.
After you have maven installed, it very easy to create quarkus project.
Step by step to create Quarkus project
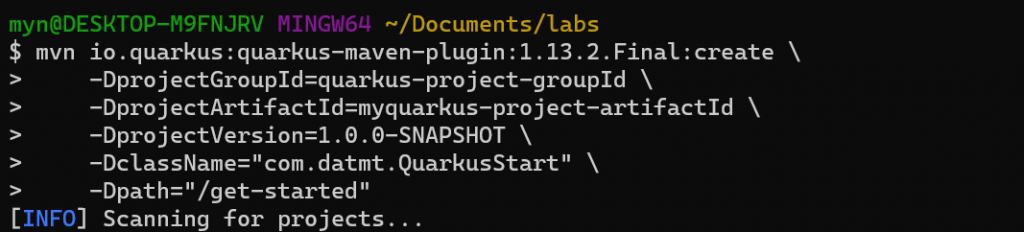
mvn io.quarkus:quarkus-maven-plugin:1.13.2.Final:create \
    -DprojectGroupId=quarkus-project-groupId \
    -DprojectArtifactId=myquarkus-project-artifactId \
    -DprojectVersion=1.0.0-SNAPSHOT \
    -DclassName="com.datmt.QuarkusStart" \
    -Dpath="/get-started"
As you can see, in the create command, you can specify group ID, artifact ID, project version, a starter class name and a resource path.
Remember that if you define a resource path, you need to specify a class name too. In my case, the class name is com.datmt.QuarkusStart.
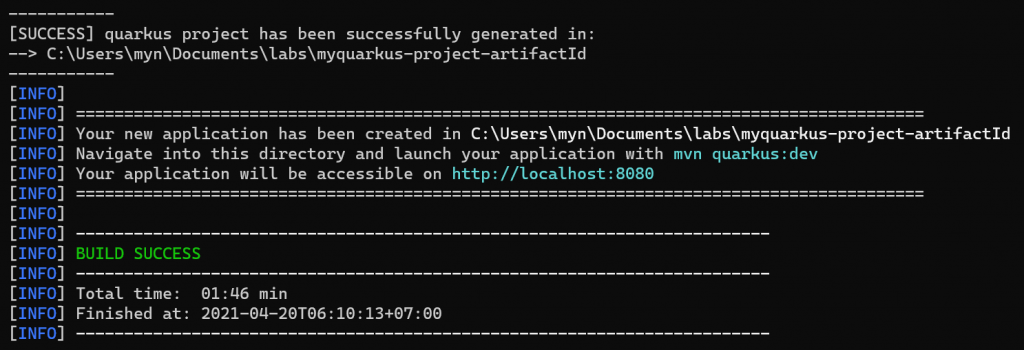
After you enter the command above, mvn will take a few minutes to scaffold the project for you.
Maven start to create quarkus project
If everything is OK, you should see a message says the project has successfully built:
Here is the project’s structure. As I use IntelliJ, there is a .idea folder. That’s not part of the project.
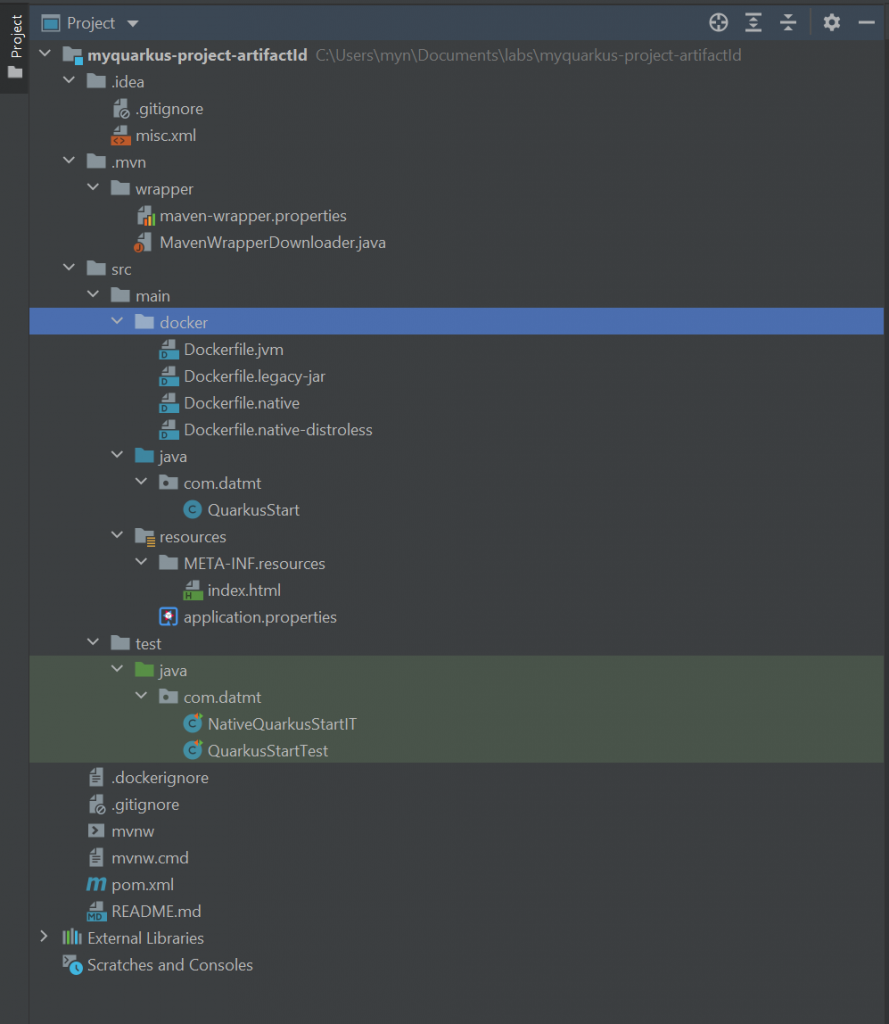
There are a few interesting files you can notice. You have Docker files to build the images. You also have tests and most interesting of all is QuarkusStart.java. This is the file we declared when creating the project.
This is the file content:
package com.datmt;

import javax.ws.rs.GET;
import javax.ws.rs.Path;
import javax.ws.rs.Produces;
import javax.ws.rs.core.MediaType;

@Path("/C:/Program Files/Git/get-started")
public class QuarkusStart {

    @GET
    @Produces(MediaType.TEXT_PLAIN)
    public String hello() {
        return "Hello RESTEasy";
    }
}
As you can see, the path seems wrong. I’ll need to modify it as follow:
package com.datmt;

import javax.ws.rs.GET;
import javax.ws.rs.Path;
import javax.ws.rs.Produces;
import javax.ws.rs.core.MediaType;

@Path("/get-started")
public class QuarkusStart {

    @GET
    @Produces(MediaType.TEXT_PLAIN)
    public String hello() {
        return "Hey quarkus starter";
    }
}
Running Quarkus application
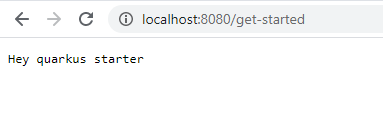
Now, let’s run the app and check if we can get the the path /get-started up and running. In the root folder of the project, run
./mvnw compile quarkus:devIf you are on Windows, you may need to remove the ./ part.
If everything is OK, you should see a message says that quarkus is listening on port 8080:

Now, let’s navigate to http://localhost:8080/get-started, we get what is expected:
As mentioned at the title of the post, by running with …quarkus:dev, you will have live reload (or hot reload) enabled. That means as you make changes in code, you can see the changes in the services without stop and run the project again.