Table of Contents
JavaFX is a great tool to quickly deploy desktop applications. However, the setup is always a pain for me, especially after JDK8, you need to download JavaFX SDK separately.
I create this JavaFX starter project to help myself and people who want to start working with JavaFX without going through the pain of setting up.
You can download the code here on github:
https://github.com/datmt/JavaFX-11-Starter-Project
Let’s get started.
Step 1: Download JavaFX SDK
Head to this site https://gluonhq.com/products/javafx/ and download JavaFX SDK 11. Save it somewhere on you computer. You will need it later.
Step 2: Clone the starter project
Clone the starter project here if you haven’t
https://github.com/datmt/JavaFX-11-Starter-Project
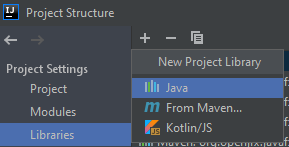
I assume that you use IntelliJ. Click on File->Project Structure->Libraries and then the (+) button:
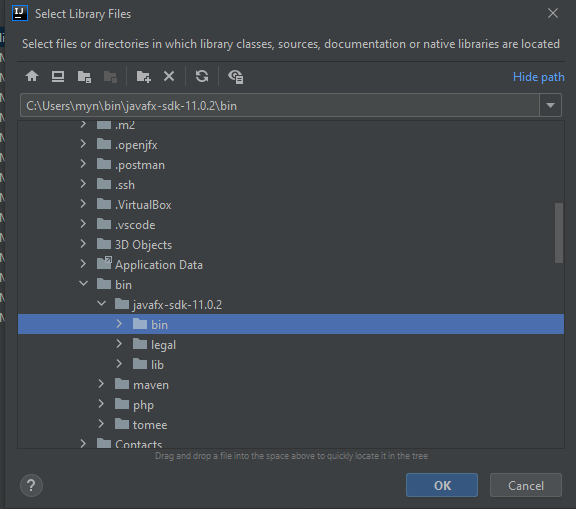
Select Java and navigate the /lib folder inside the JavaFX SDK you have just downloaded.
Click OK twice and you are ready.
Step 3: Run the application in the IDE
As you can see, we have two classes with the main function in the starter project. The one inside Main is created by the IDE. If you run the main function in this class, you may face some weird problems. The reason is given here.
So, instead of running Main, we run Launcher and your application can start just fine.
Step 4: Package the application as a Jar file
You can package and distribute the application with just a few clicks:
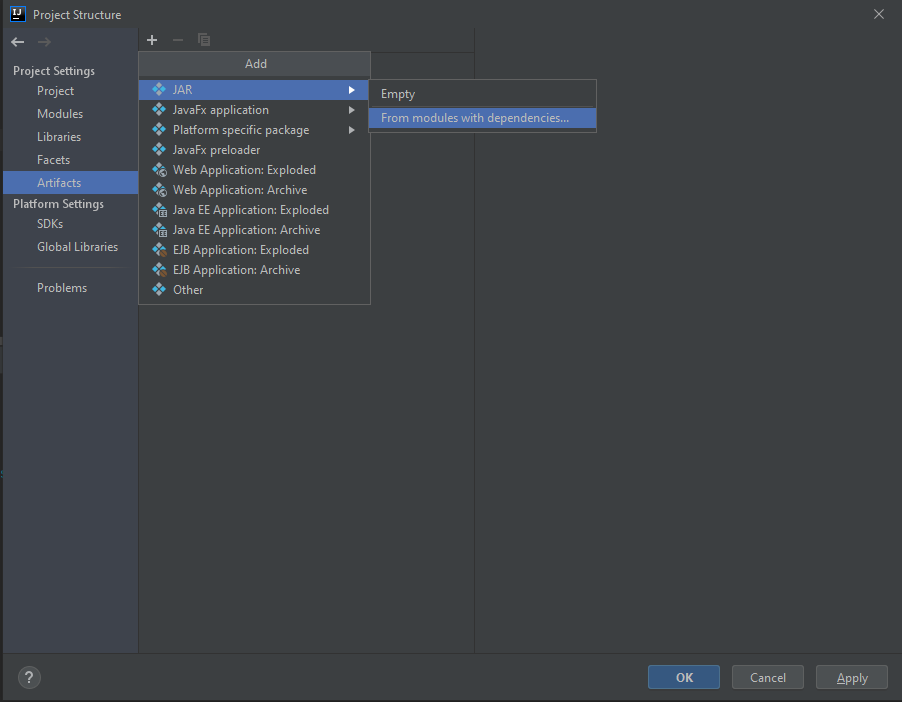
Go to Project Structure->Artifacts, click on the (+) icon:
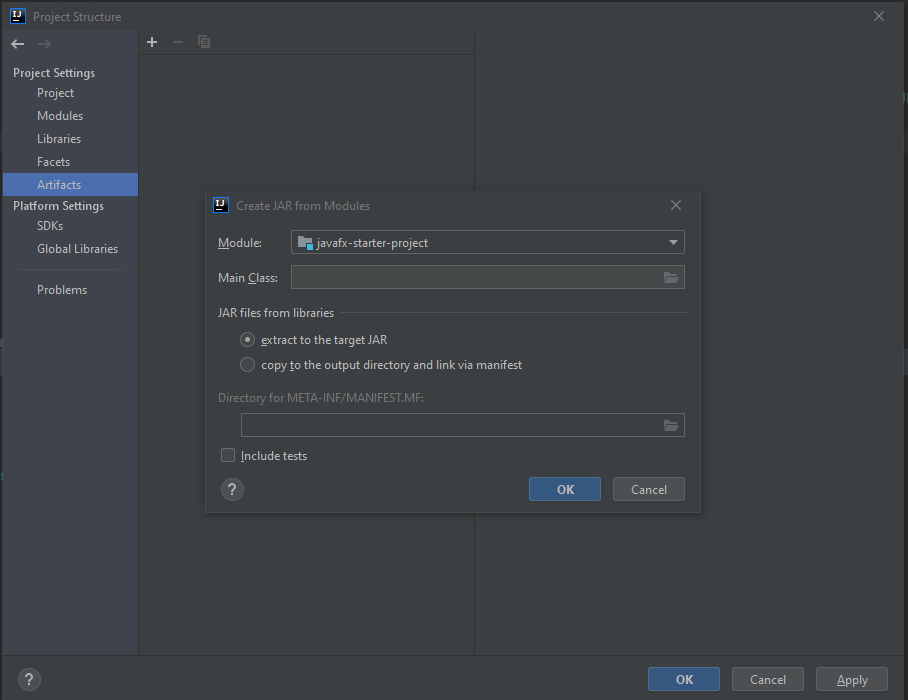
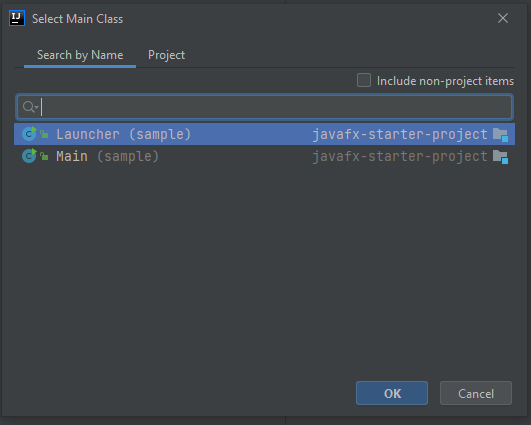
On Main class selection, make sure you select Launcher, not Main:
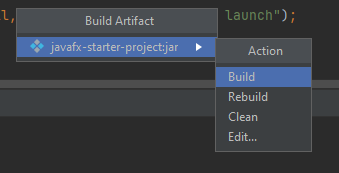
To build the artifact, click on Build->Build artifact
Your fat jar file should be inside the out folder.
So, that’s all you need to do to create and run a JavaFX application. Using this starter project, you don’t have to deal with problems that can easily cost you hours to solve (Location is required!, for example).

I build softwares that solve problems. I also love writing/documenting things I learn/want to learn.