
Table of Contents
What are we building?
This post shows you how to use Redis as a cache in the Spring boot application. I will set up three components:
- Redis cache
- Spring boot application
- A pseudo data store containing some data that changes over time. We are going to use a Map for this.
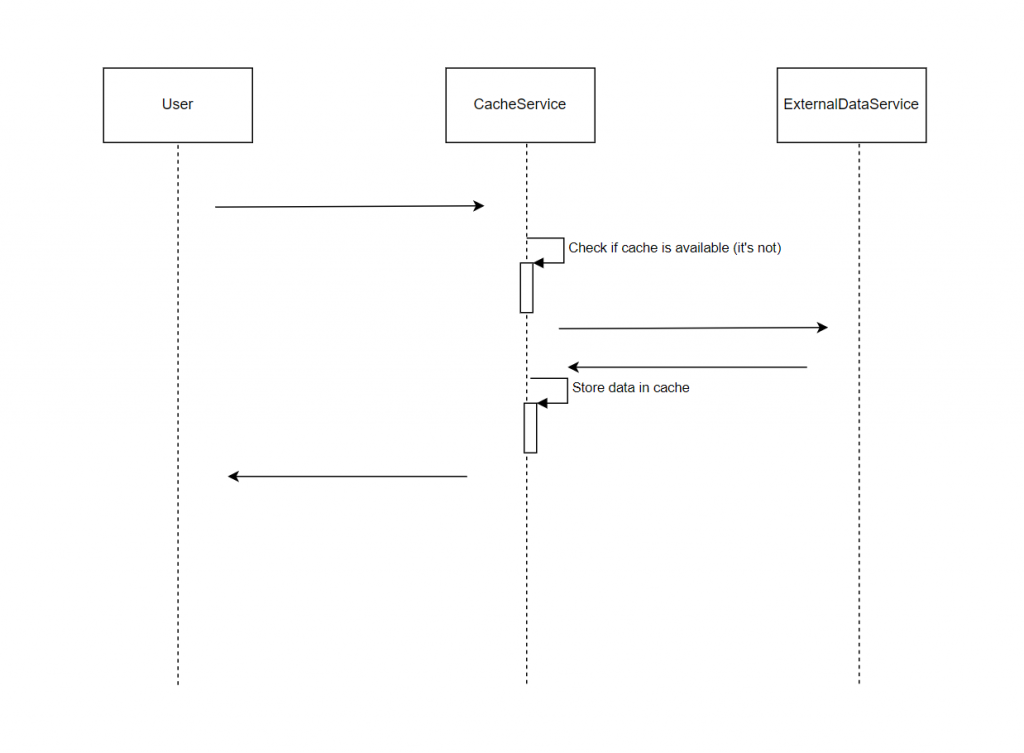
When application users make calls to the application, the application will check if data is available in the Redis cache. If yes, the data will be returned to the application users.
In case there is no data in the Redis cache, the application will query the data store to get the data and return it to the users, also stores that data in Redis cache.
Create an instance of Redis using Docker
As always, setting up services is quite simple with Docker. Use this command to quickly create a docker container running Redis. Here, I’m using the current Redis version (7.0):
docker run --rm -p 6379:6379 redis:7.0
As you can see, I also mapped ports 6379 to 6379. You can change the local port to a different number if you need to.
Spring boot Redis configuration
First of all, let’s configure Maven dependencies. There are two dependencies you need to enable Redis caching in the Spring boot application:
        <dependency>
            <groupId>org.springframework.boot</groupId>
            <artifactId>spring-boot-starter-cache</artifactId>
        </dependency>
        <dependency>
            <groupId>org.springframework.boot</groupId>
            <artifactId>spring-boot-starter-data-redis</artifactId>
        </dependency>
In addition, in the application runner class, make sure you annotate it with @EnableCaching
@SpringBootApplication
@EnableCaching //<- very important
public class SpringbootRedisMariadbApplication {

    public static void main(String[] args) {
        SpringApplication.run(SpringbootRedisMariadbApplication.class, args);
    }

}
Use Redis for caching example
Now let’s consider this scenario. There is an external HTTP service that provides a secret string. That data changes on an hourly basis and I don’t want to make requests to that external service frequently.
Creating the services
I create this service to simulate that external API:
package com.datmt.springbootrediscache;

import org.springframework.stereotype.Service;

@Service
public class ExternalDataService {
    private String secretData = "s1";

    public String getSecretData() {
        try {
            Thread.sleep(1000);//simulate long running service
        } catch (InterruptedException ex) {
            //
        }
        return secretData;
    }
    public void setSecretData(String secretData) {
        this.secretData = secretData;
    }
}
As you can see, I simulate a long-running method with a Thread.sleep function call. There is also a method to set the secret data. This is a convenient method that you don’t see much in real life.
Now, let’s create another service that plays as a cache. When the request first comes, there is no data in the cache. Our cache service will call the actual external data service. However, subsequent requests will see data from the cache.
Here is the implementation of the cache service:
package com.datmt.springbootrediscache;

import org.springframework.beans.factory.annotation.Autowired;
import org.springframework.cache.annotation.Cacheable;
import org.springframework.stereotype.Service;

@Service
public class CachedDataService {

    @Autowired
    ExternalDataService dataService;
    @Cacheable(value = "secretData")
    public String getSecretData() {
        return dataService.getSecretData();
    }
}
The secret controller
Let’s quickly create a controller to demonstrate the use of cache:
package com.datmt.springbootrediscache;

import org.springframework.beans.factory.annotation.Autowired;
import org.springframework.web.bind.annotation.GetMapping;
import org.springframework.web.bind.annotation.PutMapping;
import org.springframework.web.bind.annotation.RequestBody;
import org.springframework.web.bind.annotation.RequestMapping;
import org.springframework.web.bind.annotation.RestController;

@RestController
@RequestMapping("/secret")
public class SecretController {

    @Autowired
    ExternalDataService dataService;

    @Autowired
    CachedDataService cachedDataService;

    @PutMapping
    public void setSecret(@RequestBody String newSecret) {
       dataService.setSecretData(newSecret);
    }

    @GetMapping("/cached")
    public String getCached() {
       return cachedDataService.getSecretData();
    }

    @GetMapping("/no-cached")
    public String noCached() {
        return dataService.getSecretData();
    }


}
You can see there are two GET endpoints here: One for getting the cached data and the other for getting the fresh data. There is another PUT endpoint that allows me to change the secret (simulate the data changes).
Spring boot Redis cache in action
Let’s run the application and see the cache in action.
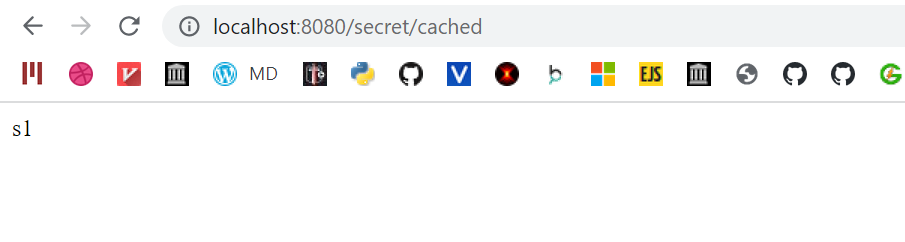
First, open a browser and visit the cached endpoint at /secret/cached. As this is the first time, there is no cache yet, you will see the page load in around 1 second and return the result:
However, if you load the page again, it will be much faster.
To verify, let’s check with Redis:
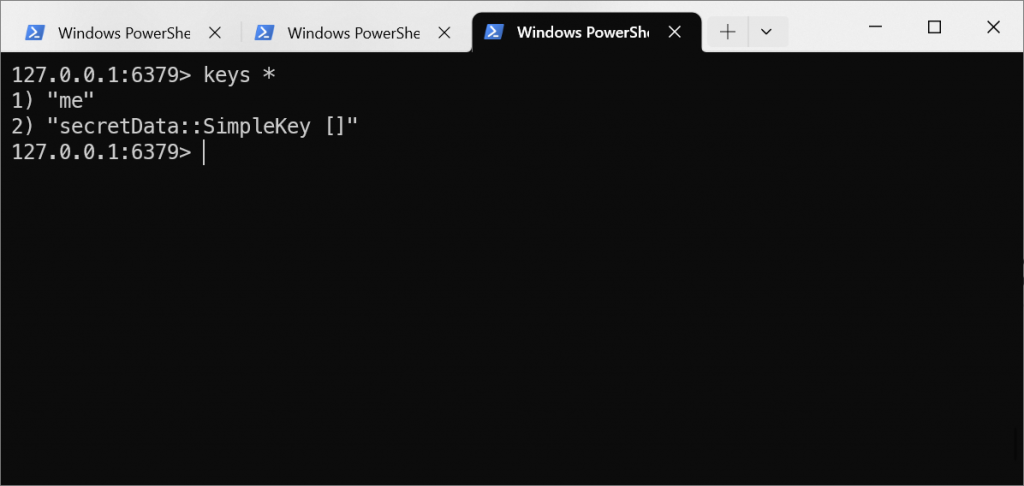
Sure enough, there is a key for our data. Let’s get the value of that key:

Sure enough, the data exist. There are some strange characters. That’s because it’s encoded.
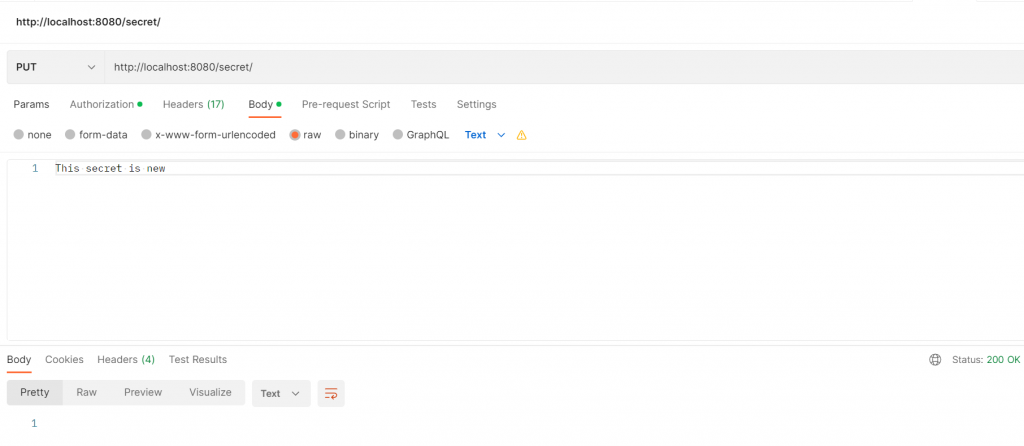
Now, let’s use Postman to change the data to the external secret service:
Let’s go to the URL where there is no caching. You can see that the new data is shown:
However, if you go to the cached URL, the old data is still there:
That’s Redis cache at work!
Redis cache custom configuration
Spring Data Redis uses many default configurations so you can get the cache service up and running fast. However, most of the time you want to adjust some settings. You can do so easily by creating a RedisCacheManager bean:
    @Bean
    public RedisCacheManager cacheManager(RedisConnectionFactory connectionFactory) {
        RedisCacheConfiguration config = RedisCacheConfiguration.defaultCacheConfig() //
                .prefixCacheNameWith(this.getClass().getPackageName() + ".") //
                .entryTtl(Duration.ofHours(1)) //
                .disableCachingNullValues();

        return RedisCacheManager.builder(connectionFactory) //
                .cacheDefaults(config) //
                .build();
    }
In the example above, I’ve set some configurations such as setting the prefix for the cache’s key and disabling null values… However, there are a lot more things you can configure. I’ll leave this to you to explore.
Conclusion
In this post, I’ve shown you how to set up Redis as a cache in a Spring Boot application. It is quite straightforward to create a Redis instance and connect to your application using existing dependencies. As usual, the code of this tutorial is available on Github.

I build softwares that solve problems. I also love writing/documenting things I learn/want to learn.