
Table of Contents
Overview
In the previous post, we tested the Auth0 integration with both the backend and frontend application and could call the backend API with tokens obtained from the frontend.
In this post, we continue with the infrastructure setup using Docker. First, we are going to get MongoDB up and running. Second, we will set up HAProxy as our reversed proxy to handle CORS errors when calling from the frontend application.
Let’s get started.
Setting up MongoDB
Setting up MongoDB is quite straightforward.
version: '3.8'

services:

  mongo_wallet:
    image: mongo:5.0
    restart: always
    container_name: mongo_wallet
    ports:
      - "27021:27017"
    env_file:
      - mongo.env
The mongo.env file is a file contains MongoDB credentials locates in the same directory as the docker-compose.yaml
MONGO_INITDB_ROOT_USERNAME=wallet_user
MONGO_INITDB_ROOT_PASSWORD=wallet_password
MONGO_INITDB_DATABASE=wallet
That’s all you need to create a MongoDB instance for local development.
Configure HAProxy for CORS
When developing web applications with a backend API, you need to resolve the CORS issue when making HTTP requests from the frontend. While there are some options to overcome this, I prefer to use HAProxy. Even though I need to do some extra setup, I don’t need to modify Spring Boot code to allow CORS.
Setting up HAProxy to add CORS header is quite simple. First, we add the HAProxy service to the docker-compose.yaml file:
  haproxy_gateway:
    container_name: haproxy_gateway
    image: haproxy:2.4.0
    restart: always
    ports:
      - "9292:9292"
    volumes:
      - ./haproxy.cfg:/usr/local/etc/haproxy/haproxy.cfg
Here is the haproxy.cfg file:
defaults
  log  global
  mode  http
  option  httplog
  option  dontlognull
  timeout connect 5000
  timeout client  50000
  timeout server  50000
  option forwardfor
  option http-server-close

frontend wallet
  bind :9292
  mode tcp
  acl is_options method OPTIONS
  use_backend cors_backend if is_options
  default_backend wallet_backend

backend wallet_backend
  mode http
  balance roundrobin
  # START CORS
  http-response add-header Access-Control-Allow-Origin "http://localhost:4200"
  http-response add-header Access-Control-Allow-Headers "*"
  http-response add-header Access-Control-Max-Age 3600
  http-after-response set-header Access-Control-Allow-Credentials "true"
  http-response add-header Access-Control-Allow-Methods "GET, DELETE, OPTIONS, POST, PUT, PATCH"
  # END CORS
  # Don't set IP address of the server, use the hostname instead
  # set local-dev-1, 2 to your local ip address (192.168.x.x)
  server w1 host.docker.internal:9191 check
You don’t need to understand all the configurations, just a few lines:
- Line 6 in the docker-compose.yaml file, I mapped port 9292 from the local machine to the same port inside the HAProxy container
- Line 13 in haproxy.cfg file, I listen to port 9292 of the container and forward that to a backend called wallet_backend
- The wallet backend in turn points to our Spring Boot application, which runs on the docker host (our local machine) at port 9191. The port 9191 is defined in the application.yaml file.
If you happen to choose a other port than 9191 or 9292, update the configuration accordingly.
And that’s it, we have finished setting up the infrastructure for developing the app locally.
Configure MongoDB in Spring Boot App
Now we have the MongoDB database up and running. Let’s configure it for our Spring Boot application.
First of all, let’s enter the details in application.yaml
  data:
    mongodb:
      database: ${MONGO_DATABASE}
      username: ${MONGO_USERNAME}
      password: ${MONGO_PASSWORD}
      host: ${MONGO_HOST}
      port: ${MONGO_PORT}
As you can see, all the details are stored in environment variables. Hardcoding app’s credentials in code is a bad practice.
The details is stored in a .env file that we will load using IntelliJ IDEA .env plugin. In the production environment, we will create the environment variables using docker.
MONGO_USERNAME=wallet_user
MONGO_PASSWORD=wallet_password
MONGO_DATABASE=wallet
MONGO_HOST=localhost
MONGO_PORT=27022
To add the environment file in Intellij IDEA, edit the run configuration and add the file like this:
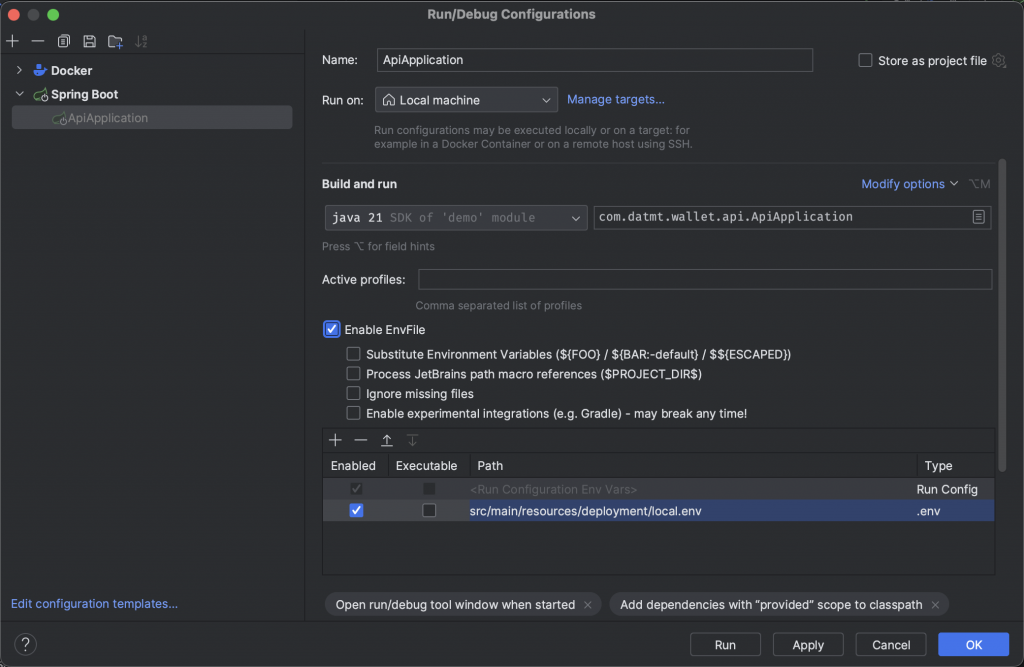
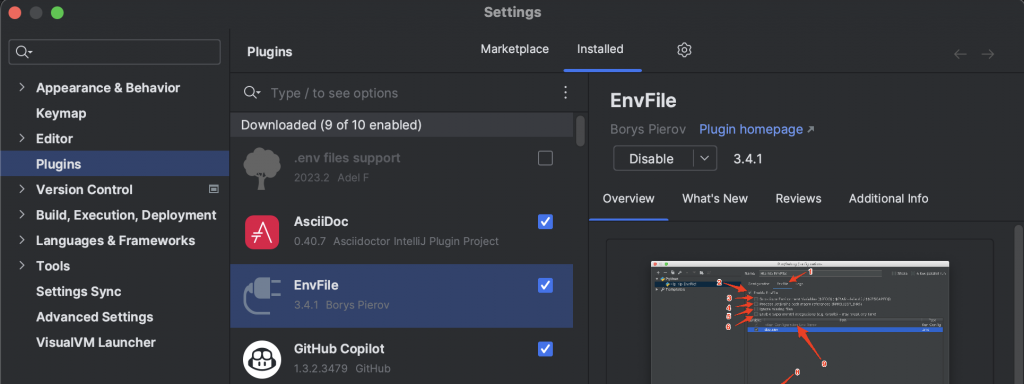
If you don’t have Enable EnvFile, you need to install the EnvFile plugin as shown in the screenshot here:
And that’s it, now the API can run with MongoDB configured.
Conclusion
In this post, we’ve set up the infrastructure for the app to run on our local machine. Specifically, we set up MongoDB as our database. We also set up HAProxy to bypass CORS errors when making HTTP requests from the frontend to the backend. Now we are ready to delve into creating the API.

I build softwares that solve problems. I also love writing/documenting things I learn/want to learn.