How To Set Static IP To VirtualBox VM
So you’ve installed a new VM on VirtualBox and everything went smoothly. When you boot up the VM and type
ip aand here is what you got:
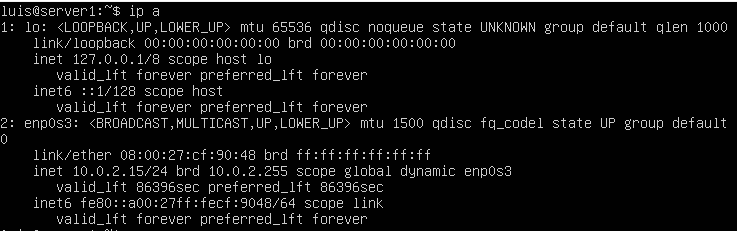
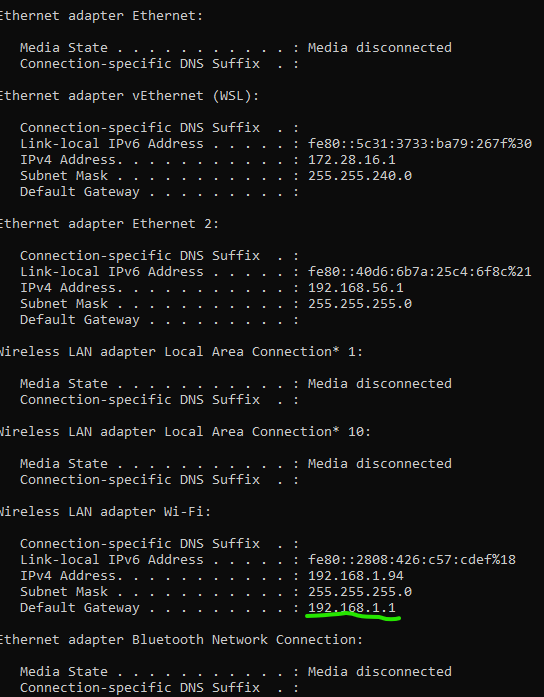
You noticed that there isn’t any IP address that begins with 192.168! On your host machine, you type
ipconfigfor Windows, or
ifconfigFor Linux/Mac, you got something like this:
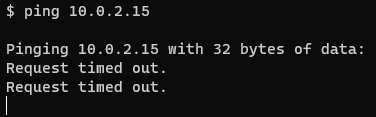
You may even try to ping the VM’s address but no luck!
Well, I’ll show you how to fix that.
How to change network settings so you can ping the VM
The first thing you do is going to Machine->Settings and click on Network then set the settings as below:
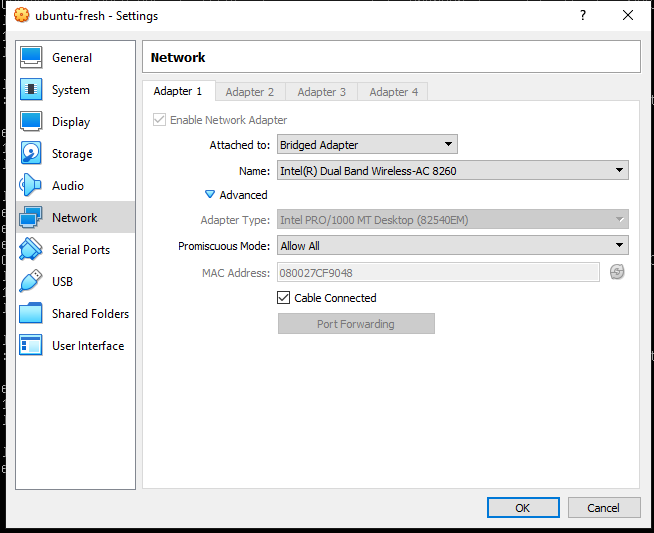
Change:
Attached to -> Bridge Adapter
Promiscuous Mode -> Allow All
Check Cable Connected.
Then click OK.
Wait for up to 1 minute for the VM to apply the changes. When you type
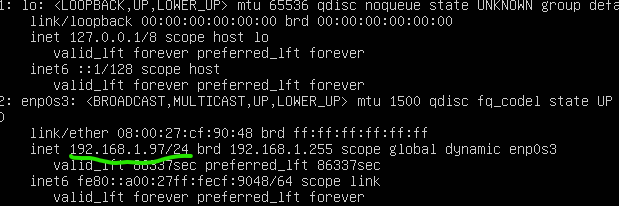
ip aagain, you should see there is one IP of the VM begins with 192.168
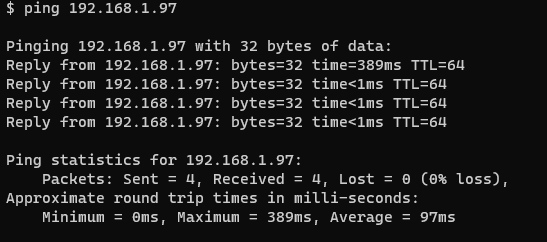
And you can ping from the host machine to the VM:
That’s great, however, the IP can be changed without you knowing it. That’s usually not a good thing. Next, I’m going to show you how to set a static (fixed) IP for the VM. No worries, it’s pretty quick!
How to set static IP for VirtualBox’s VM
Noticed that when you typed ip a, you see the network interface of your IP (begins with 192.168) is something like enp0s3 (yours could be different). You need to know this for the next step.
Next, type:
sudo touch /etc/netplan/01-netcfg.yamlSince your VM is new, the file shouldn’t be available yet. The command above creates the file.
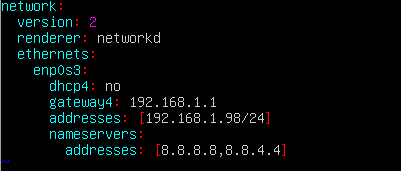
Next, use your favorite editor the put the following text in the file:
network:
  version: 2
  renderer: networkd
  ethernets:
    enp0s3:
      dhcp4: no
      gateway4: 192.168.1.1
      addresses: [192.168.1.97/24]
      nameservers:
        addresses: [8.8.8.8,8.8.4.4]
Replace enp0s3 with your VM’s network interface and 192.168.1.97 with your favorite IP address and save the file.
Here, I set the IP to 192.168.1.98 to make it different from what it currently is:
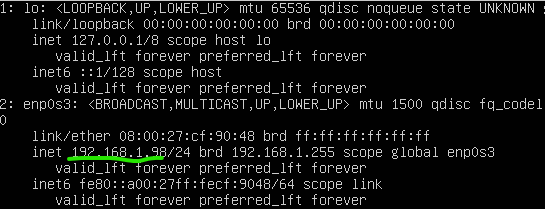
Now, type:
sudo netplan applyThen
ip aYou should see the IP updated as in the config:
Now you have a static IP that you can ping from the host and other VM on your PC.