Table of Contents
In this tutorial, I’m going to show you how to set up Apache Tomcat as a target runtime for Eclipse so you can deploy your web application right from Eclipse.
Let’s get started!
Download Apache Tomcat
There are various Apache Tomcat versions available. The latest version is 10. I’m going to set up version 10 in this tutorial. Other versions don’t need a different setup. You still can use this tutorial to set up Tomcat 8 or 9.
Since I’ll use Tomcat 10, I go to this page: https://tomcat.apache.org/download-10.cgi
And download the zip file for my OS. Since I’m using Windows 10 64bit, I’ll choose the following file:
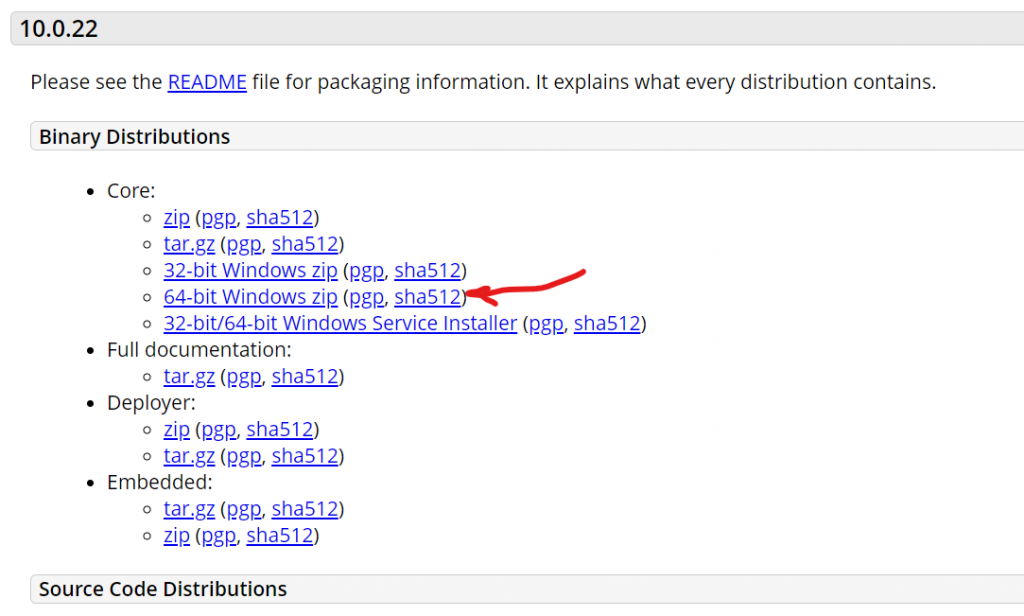
After downloading, the next step is to extract the downloaded to your disk. You can choose any folder, it doesn’t matter.
Now, let’s set up Apache Tomcat with Eclipse.
Setup Apache Tomcat with Eclipse
Open Eclipse, click on Window->Show view and select Servers:

You’ll notice the servers view appears at the bottom of the screen:
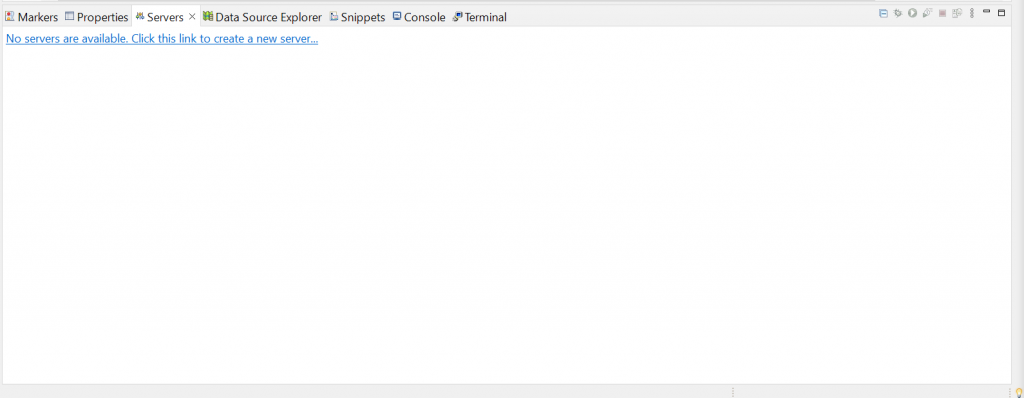
If you are like me, you should see no servers available. Click on the link “Click this link to create a new server…” to configure Tomcat.

On this screen, select the right Tomcat version and click on Next.
On the next screen, browse to where you extracted tomcat:

Now, you can click on Finish to complete adding a new server.
The last step is to create a run configuration using the Tomcat server we’ve just created.
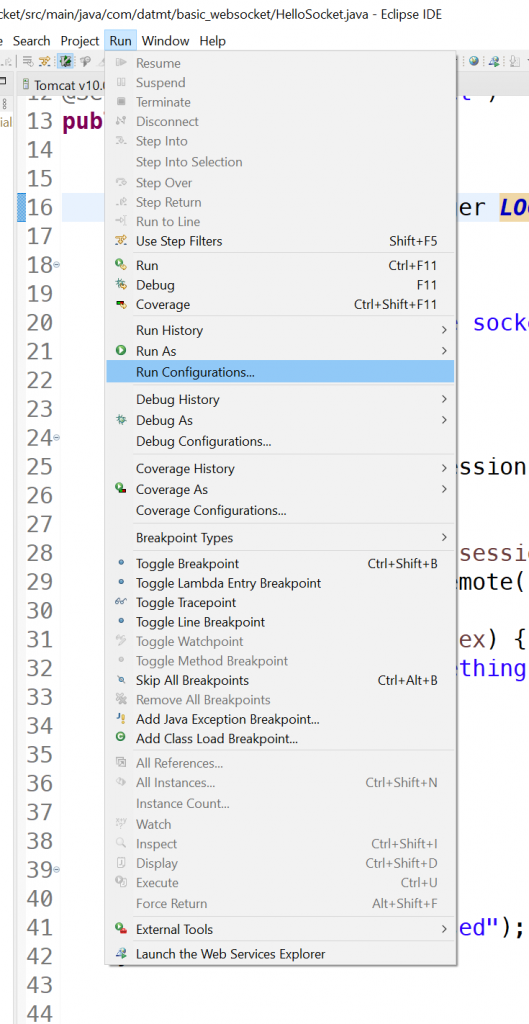
Click on Run->Run configurations:
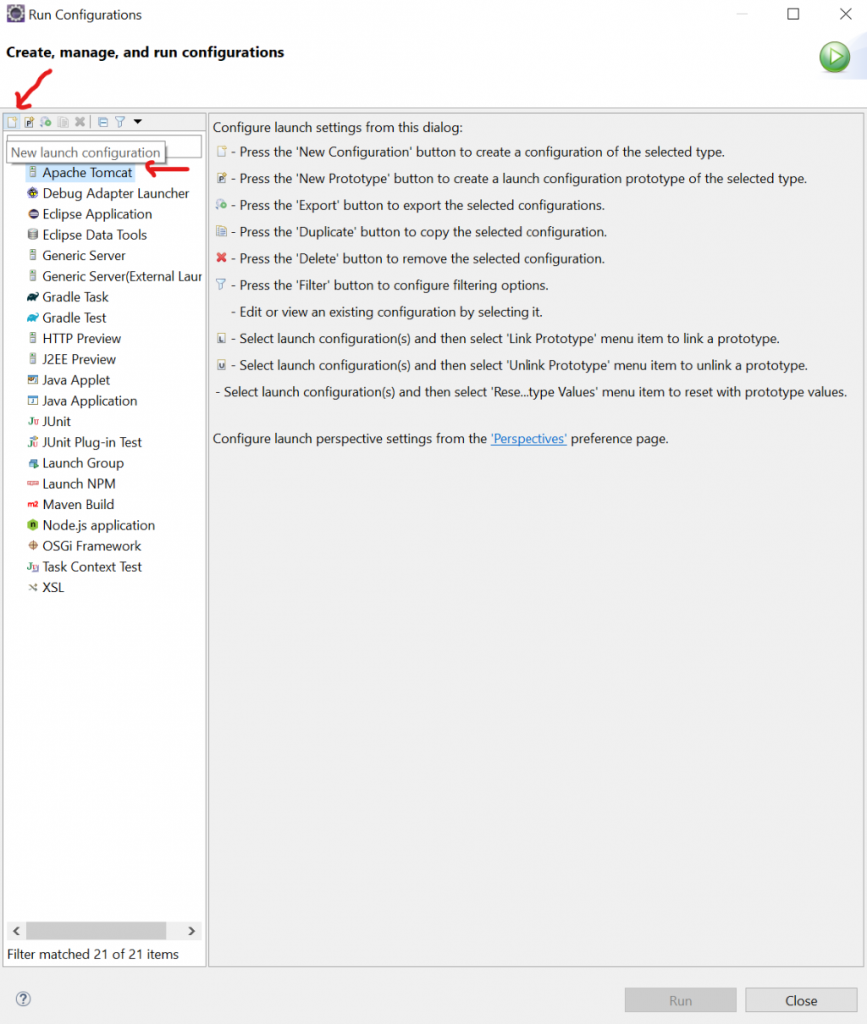
In the next window, select Apache Tomcat and click on the new icon:
Give the configuration a name and select the server you’ve created. Normally, the server box is selected already:
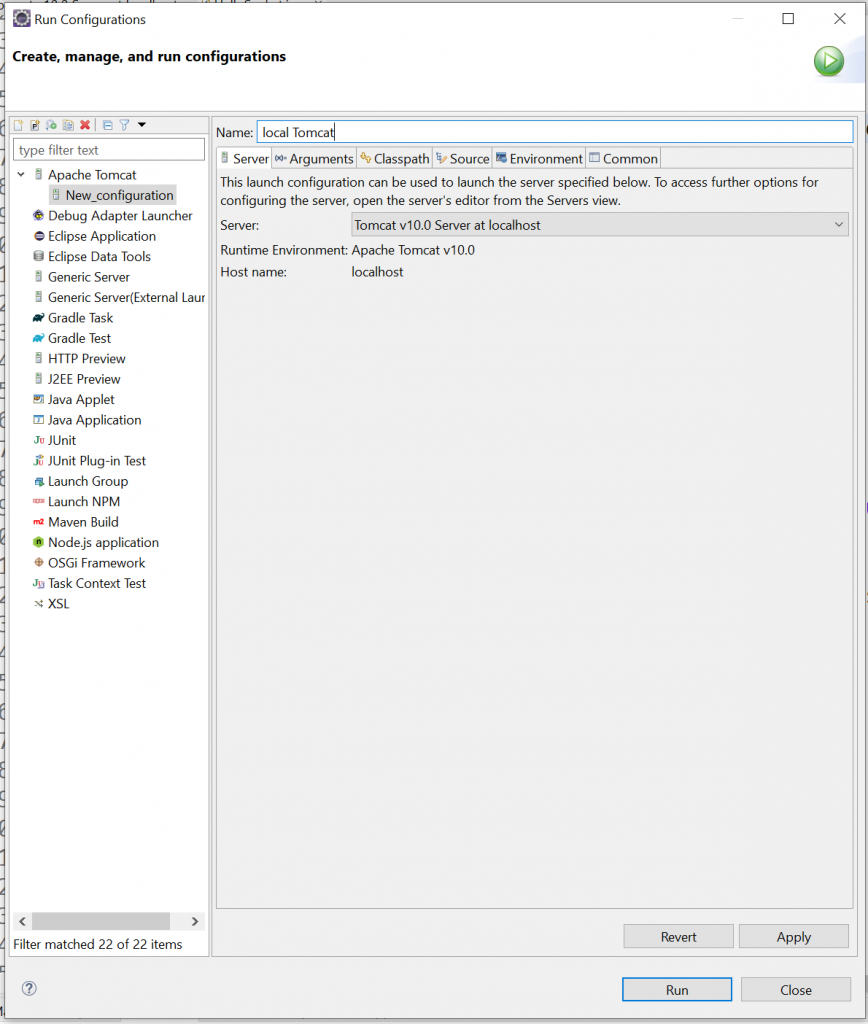
Click on apply, now you have successfully configure Apache Tomcat with Eclipse.
Run Java EE application in Eclipse using Tomcat
Now you have Tomcat configured, click on Run->Run configurations again and double click on the configuration you’ve just created.
You should see the application deployed successfully:


I build softwares that solve problems. I also love writing/documenting things I learn/want to learn.