Table of Contents
I’ve been trying installing a Kubernetes cluster for while following the official documentation without any success. It turned out the official documentation was missing some important steps (or they put the missing steps else where I couldn’t find). Anyways, if you are struggling to get a Kubernetes up and running, this step by step tutorial is for you.
My environment
I’m going to setup a k8s cluster with 1 master node and 1 worker node. Once you have a master node up and running, adding one or more worker nodes does not require extra expertise.
I also use VirtualBox running two identical Ubuntu 18.04 VM. I guess that the newer Ubuntu versions should work fine (haven’t tested).
Step by step setting up Kubernetes cluster
There are some steps you need to run on all machine and some you need to run on specific node only (master/worker). We are covering the common steps first:
Steps that need to run on all nodes
Step 1: Disable swap
To disable swap, simply remove the line with swap in /etc/fstab
sudo vim /etc/fstab
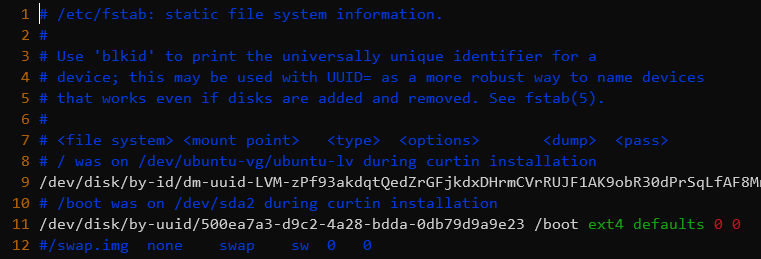
As you can see, previously, I had swap enabled in line 12. I commented out that line with the # symbol.
Save the file and swap is off.
Step 2: Install docker run time
sudo apt-get install \
    apt-transport-https \
    ca-certificates \
    curl \
    gnupg \
    lsb-release

curl -fsSL https://download.docker.com/linux/ubuntu/gpg | sudo gpg --dearmor -o /usr/share/keyrings/docker-archive-keyring.gpg

echo \
  "deb [arch=amd64 signed-by=/usr/share/keyrings/docker-archive-keyring.gpg] https://download.docker.com/linux/ubuntu \
  $(lsb_release -cs) stable" | sudo tee /etc/apt/sources.list.d/docker.list > /dev/null


sudo apt-get update
sudo apt-get install -y docker-ce docker-ce-cli containerd.io
Step 3: Configure cgroup
I couldn’t find any clear instruction on the official documentation to set systemd cgroup (I don’t really know what that means). However, it can be done in very simple command. Make sure you switch to root first:
cat > /etc/docker/daemon.json <<EOF
{
  "exec-opts": ["native.cgroupdriver=systemd"],
  "log-driver": "json-file",
  "log-opts": {
    "max-size": "100m"
  },
  "storage-driver": "overlay2",
  "storage-opts": [
    "overlay2.override_kernel_check=true"
  ]
}
EOF
Make sure you restart docker after this:
systemctl restart docker
Step 4: Install kubeadm, kubelet, kubectl
You can easily install these k8s tools using the following commands:
sudo curl -fsSLo /usr/share/keyrings/kubernetes-archive-keyring.gpg https://packages.cloud.google.com/apt/doc/apt-key.gpg

echo "deb [signed-by=/usr/share/keyrings/kubernetes-archive-keyring.gpg] https://apt.kubernetes.io/ kubernetes-xenial main" | sudo tee /etc/apt/sources.list.d/kubernetes.list

sudo apt-get update
sudo apt-get install -y kubelet kubeadm kubectl
sudo apt-mark hold kubelet kubeadm kubectl
Now, we have reached the end of the common steps. Next, let’s set up the master node.
Step 5: Commands to run on the master node
On the master node, run:
kubeadm init
This step would take quite a while since kubeadm is going to download from the internet. It took me around 5 minutes to finish but this time can vary. If everything goes right, you should see a similar message as below:
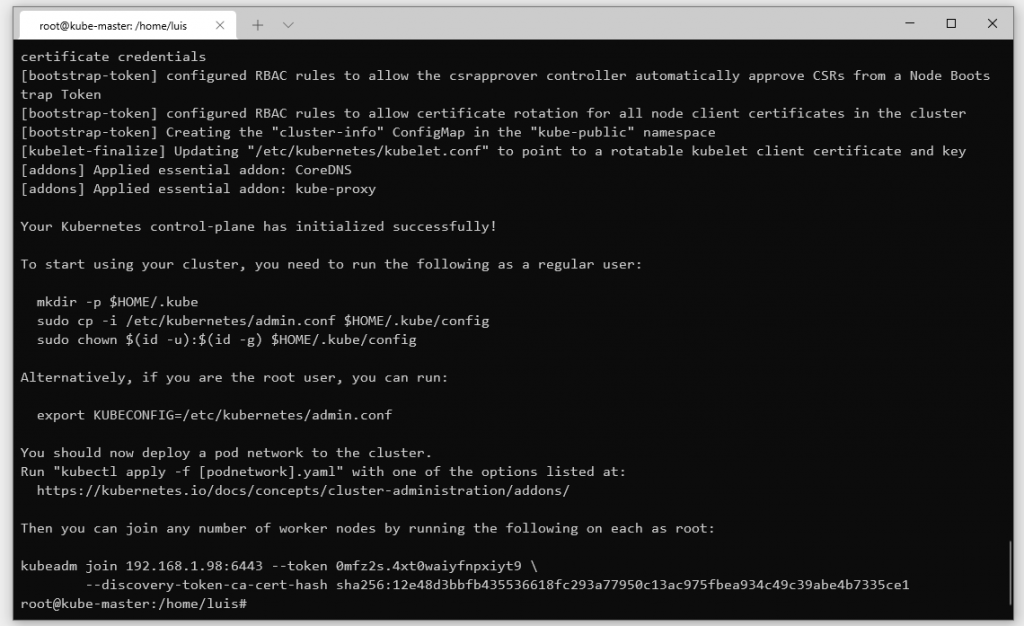
Make sure to copy the line starts with kubeadm join...
You will need to run that on worker nodes later.
Still on the master node, switch to a regular user (if you haven’t) and run the following command:
mkdir -p $HOME/.kube
sudo cp -i /etc/kubernetes/admin.conf $HOME/.kube/config
sudo chown $(id -u):$(id -g) $HOME/.kube/config
Finally, you need to install network plugin for the master node (super important!)
sudo kubectl apply -f "https://cloud.weave.works/k8s/net?k8s-version=$(sudo kubectl version | base64 | tr -d '\n')"
After the network plugin applied if you run kubectl cluster-info now, you should see the following:

Step 6: Commands on worker nodes
Now you have the master node ready. Simply run the command kubeadm join... you copied previously and run it on the worker node. In my case the command is:
kubeadm join 192.168.1.98:6443 --token 0mfz2s.4xt0waiyfnpxiyt9 \
        --discovery-token-ca-cert-hash sha256:12e48d3bbfb435536618fc293a77950c13ac975fbea934c49c39abe4b7335ce1
You should see the message saying the node has successfully joined the cluster:
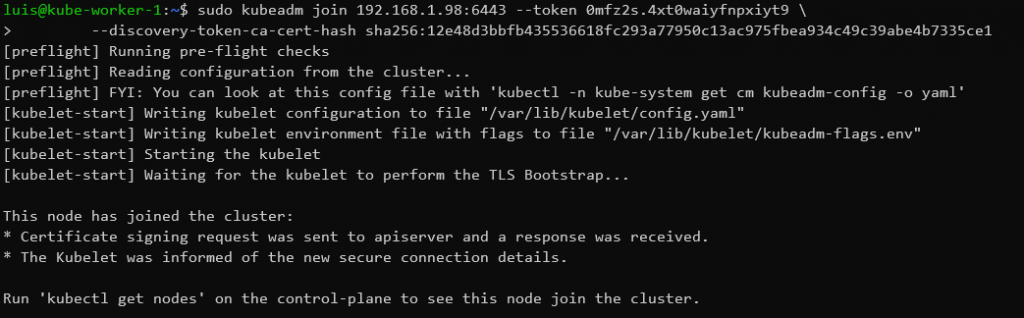
If you see something like that, that means the node has joined successfully.
Back to the master node, run:
kubectl get nodes
You should see the worker is not ready:
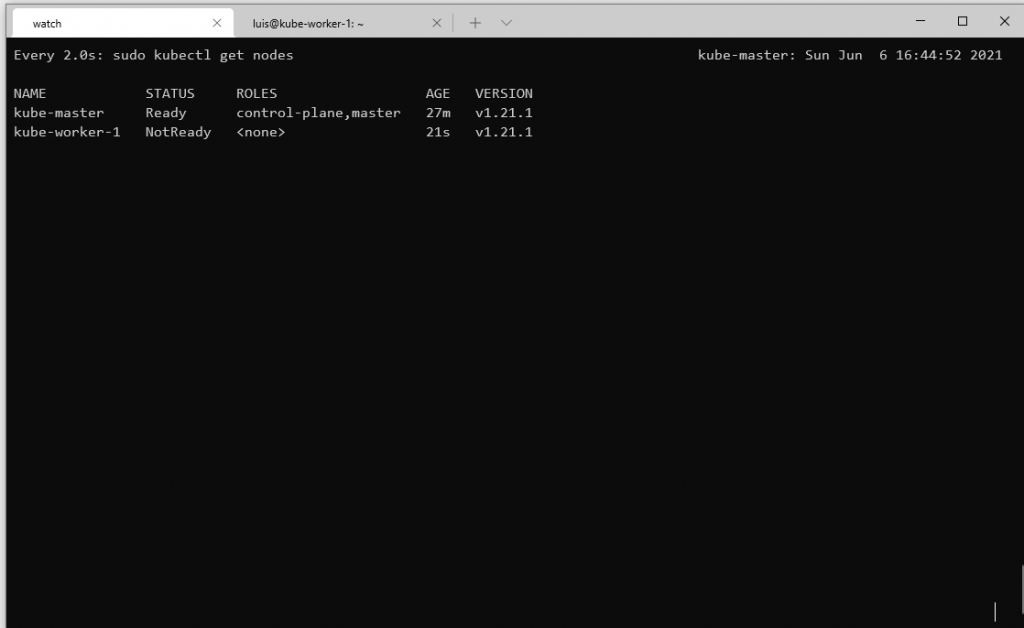
Don’t worry, after a few minute max, you should see this:
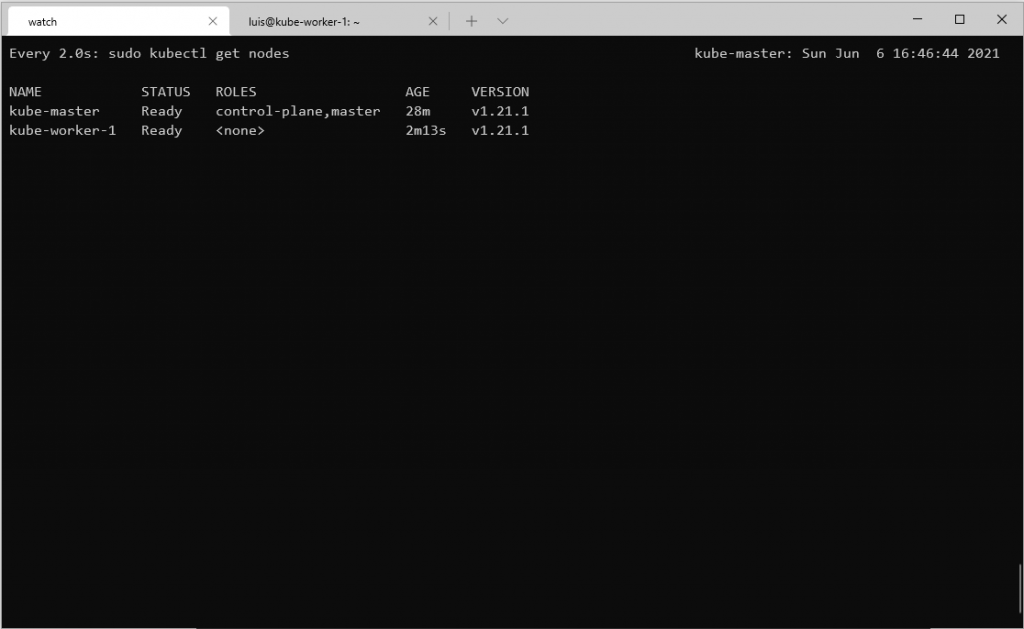
Congratulations! You have successfully install a Kubernetes cluster!
Running a test deployment
Let’s create a simple deployment with nginx and see if it works.

As you can see, the deploy has successfully created. Let’s check the pods:
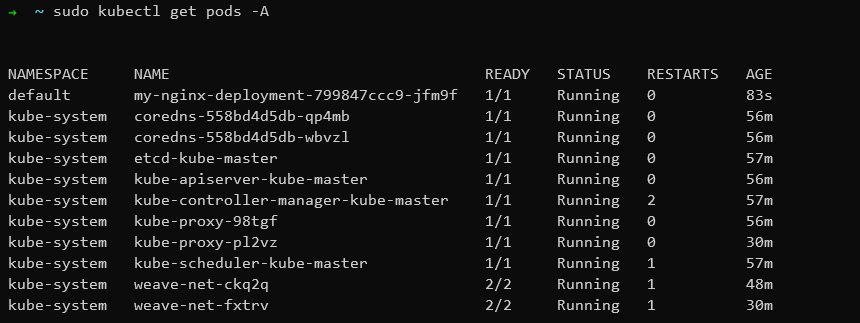
Our nginx pod is at the top!

I build softwares that solve problems. I also love writing/documenting things I learn/want to learn.