Table of Contents
Many people had difficulties installing Oracle database on docker. One of the reasons is the image is not available on Docker hub. There are some tutorials in the comment section but they don’t work anymore. In this post, I’m going to show you how to install Oracle database on docker (12c, 19c, 21c…).
Create an account on Oracle docker registry
As I mentioned at the beginning of this post, Oracle database images are not available on Docker hub anymore, even after you log in. Luckily, you can obtain the images from Oracle docker’s registry at https://container-registry.oracle.com.
To be able to pull images from this registry, you need to:
- Register an account by going to https://profile.oracle.com/myprofile/account/create-account.jspx
- After that, make sure you accept Oracle’s terms and conditions. Without this step, you will not be able to pull the images.
Get the name of the image you want to pull
Now you already have an account, log in to https://container-registry.oracle.com/ with your credentials and search for “database”
You should see a result page similar to this:
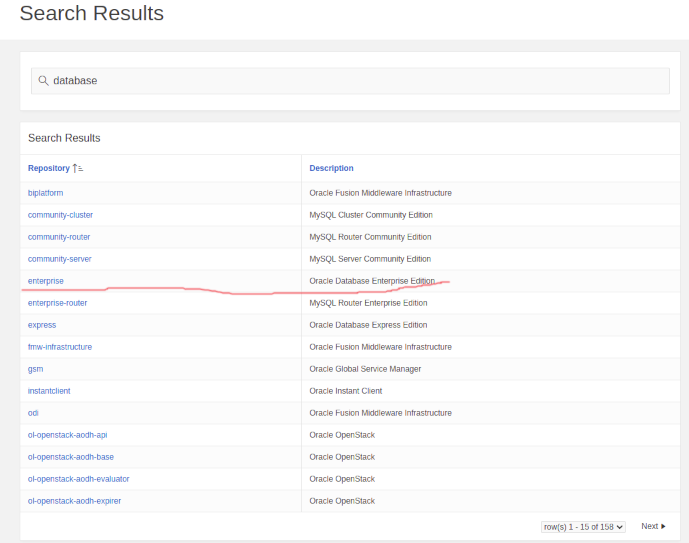
Let’s click on enterprise (the line I underscore with the red line there). On the new page that appears, scroll to the bottom, you will see the list of images available for download:
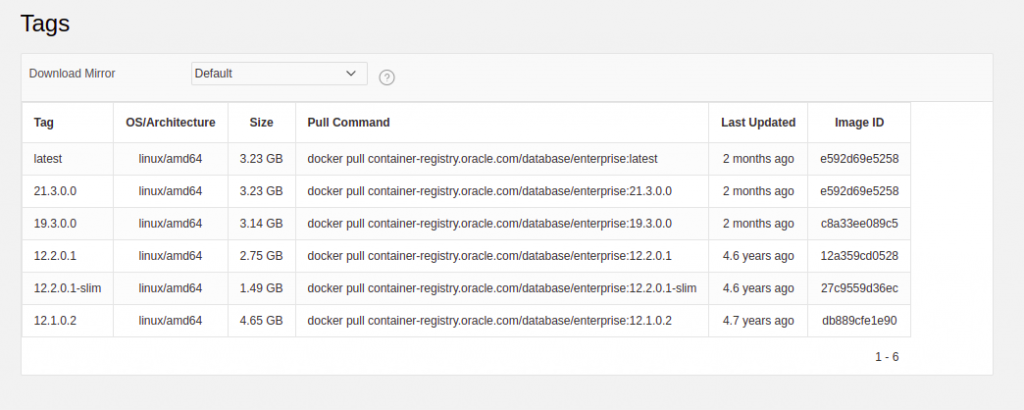
As you can see, there are various database versions you can download. But, how can you download a specific image? Using docker pull, of course.
Pull the right version of Oracle database image
From the available images, you can choose the version you want to pull. FOr me, I will pull version 12.2.0.1. To do that, I need first log in to Oracle container registry from the command line:
docker login container-registry.oracle.com
You will see prompts to input your username and password. If you enter the details correctly, you should see the login succeeded message:

Now, you can pull the image from oracle container registry:
docker pull container-registry.oracle.com/database/enterprise:12.2.0.1
You should be able to pull the image without issue.
If you see an error message mentioning the image does not exist or you don’t have the right, you probably haven’t accepted Oracle’s terms and conditions. Make sure you complete this before pulling the image.
Running the container
To create an Oracle database container, run the following command:
docker run -dit -p 1521:1521 --name oracle_db container-registry.oracle.com/database/enterprise:12.2.0.1
It may take a few minutes for the container to complete boot. You may want to monitor the log by using this command:
docker logs -f oracle_db
If you choose a different name for your container, change oracle_db to your container’s name.
When you see this in the log, that means the container is ready to use:
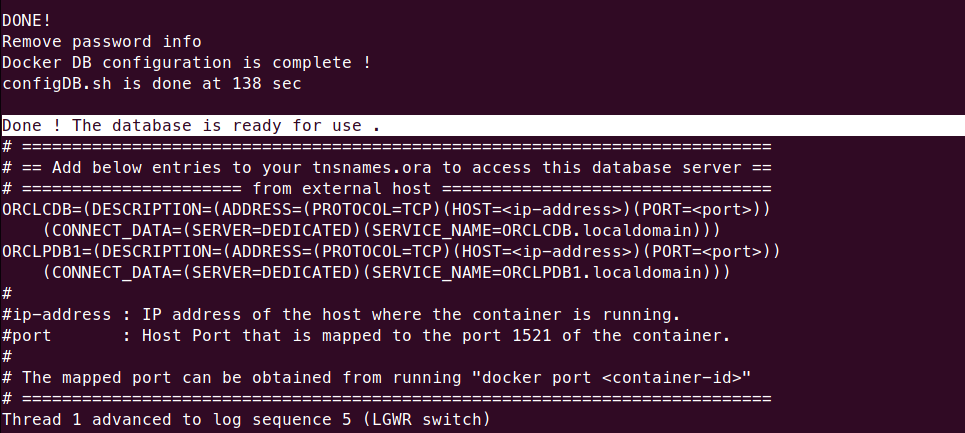
Now you can exec into the container to do management tasks:
docker exec -it oracle_db bash -c "source /home/oracle/.bashrc; sqlplus /nolog"
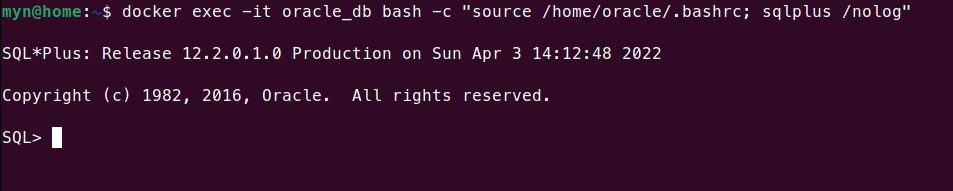
Now you are ready to execute commands.
Create a user in Oracle database
While you are in the container SQL command line, you can create a user so you can use that to connect to the database later from clients (such as sqldeveloper).
connect sys as sysdba;
There will be a prompt that asks for a password, enter Oradoc_db1

Now execute the following commands (one per line) to create an user.
alter session set "_ORACLE_SCRIPT"=true;
create user db_user identified by db_user_pass;
GRANT ALL PRIVILEGES TO db_user;
In the script above, I created a user called db_user with password db_user_pass
You can change such details to your liking.

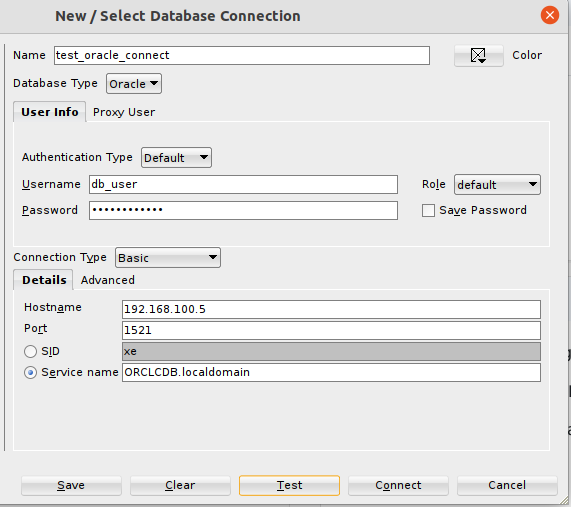
Connect to Oracle database using sqldeveloper
Now we have created a user. We can use the credentials to connect to the database as follow:
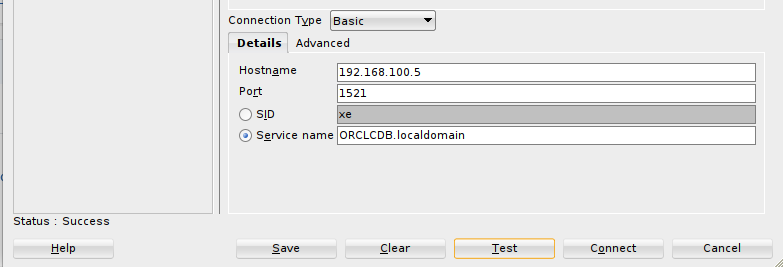
Now, click on the Test button, and you should see the success text appears at the bottom left:
Conclusion
As you can see, it may take some extra steps to install Oracle databases with docker since the images are not publicly available on Docker hub. You need to create an account with Oracle, and accept the terms and conditions. After that, you can create containers as usual.
Note that I used Oracle database 12c image in this example. However, in case you need other images (19c, 21c…) they are also available on Oracle image repository.

I build softwares that solve problems. I also love writing/documenting things I learn/want to learn.
Don’t forget to accept the licence or else you’ll be faced with “Error response from daemon: pull access denied for container-registry.oracle.com/database/enterprise, repository does not exist or may require ‘docker login’: denied: requested access to the resource is denied”
to accept the license goto the https://container-registry.oracle.com/ website database > enterprise > license (licenses is its own message div on the right)
found error then run this command and logs
docker run -dit -p 1521:1521 –name oracle_db container-registry.oracle.com/database/enterprise:12.2.0.1
ERROR : config DB failed, please check log /home/oracle/setup/log/configDB.log for details!
The log is quite clear. You need to check the log for more details. Can you share the log here?
when I press test on creating the connection o sqldeveler it says (the network adapter could not establish the connection)
No shot, where did you get that hostname ? So random.
running: docker inspect –format='{{.NetworkSettings.IPAddress}}’ oracle_db
shows: 172.17.0.2
whatever, still won’t work… not sure if it’s a docker bridge error on windows(11) or what
“The Network Adapter could not establish the connection”
The host name is your host’s IP address since you already map the port to the host
Not sure what you mean, but here is what I did to finally get a connection working in sqldeveloper, as well as the vscode extension.
$docker ps ports were showing as 0.0.0.0:1521->1521/tcp, using 0.0.0.0 as the hostname made it work.
Hello Đạt Trần,
Thank you for your blog. Through this i can connect oracle db through docker. But I’ve issue… How can i connect it through my own machine dbeaver??
I dont know what ( url_host , port, database , servicename ) it is running on.
Are they on the same machine (Your oracleDB docker & DBeaver)? If so, you need to map oracle DB port to your local machine port and connect using DBeaver using your machine’s IP and the mapped port