Table of Contents
Recently, I had to configure an API to use Keycloak to authenticate and authorize users of a web application. After spending almost two weeks, I finally got the app up and running as required. If you are on the same boat, read on since I’ll provide step by step (with pictures!) to help you save time on this setup so you can spend more time with actual development.
If you need help integrating Keycloak with Spring Boot 3, check this tutorial out.
API Requirements
There are some requirements as follow:
- The spring boot API can create and login (return access token) to the caller
- There are three roles (
admin,moderator,member) in the app and each API endpoint can be guarded by a specific role require. There are also endpoints that don’t require authorization (publicly available) - Endpoints that are accessible by
memberare also accessible byadminandmoderator. Endpoints that are accessible bymoderatorare accessible byadmin
Code repository
If you are the impatient kind (like me), you can skip the post and go directly to the source code (available on Github) to start tinkering with the application here.
However, when you are stuck, feel free to go back to this post to find the missing pieces.
Quick Keycloak setup with docker compose
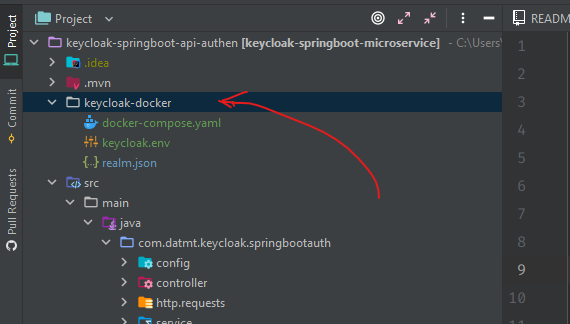
If you have a Keycloak instance up and running, you can skip this part. However, in case you haven’t, use the docker-compose file below to quickly set up Keycloak:
version: '3'

services:
  keycloak:
    container_name: keycloak
    image: jboss/keycloak:15.0.2
    restart: always
    env_file: ./keycloak.env
    depends_on:
      - keycloak_db
    volumes:
      - ./realm.json:/tmp/realm.json
    ports:
      - "18080:8080"


  keycloak_db:
    container_name: keycloak_db
    image: mariadb:10.3.26
    restart: always
    volumes:
      - keycloak_db_vol:/var/lib/mysql
    env_file:
      - ./keycloak.env

volumes:
  keycloak_db_vol:
The keycloak.env contains some environment variables:
KEYCLOAK_USER=kc_dev
KEYCLOAK_PASSWORD=kc_dev1231232
KEYCLOAK_IMPORT="-Dkeycloak.profile.feature.upload_scripts=enabled"
DB_VENDOR=mariadb
DB_ADDR=keycloak_db:3306
DB_DATABASE=keycloak_1
DB_USER=root
DB_PASSWORD=root

MYSQL_ROOT_PASSWORD=root
MARIADB_DATABASE=keycloak_1
Now run docker-compose up -d then you should be able to access keycloak at http://localhost:18080 in a few minutes (docker may need to pull the images from its registry, which depends largely on the speed of your connection).
For the lazy guys, please go to this location in the repo and hit docker-compose up -d
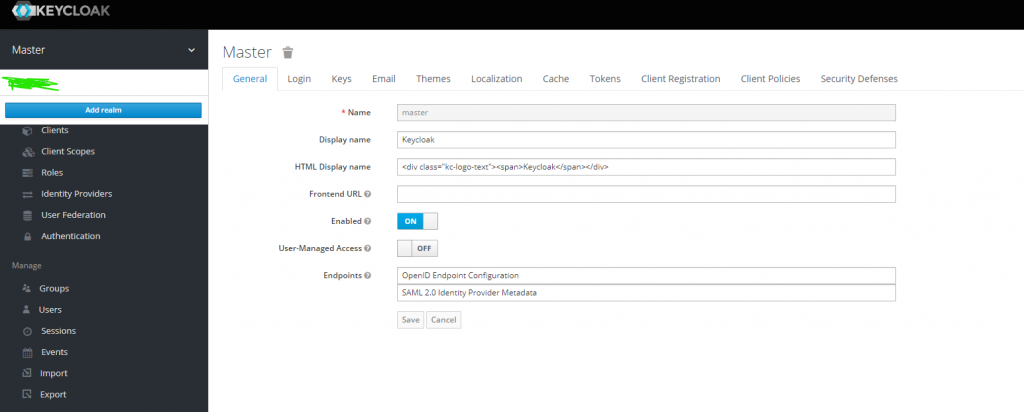
Once, you have access to Keycloak, login with the id and password specified in the environment file (kc_dev and kc_dev1231232).
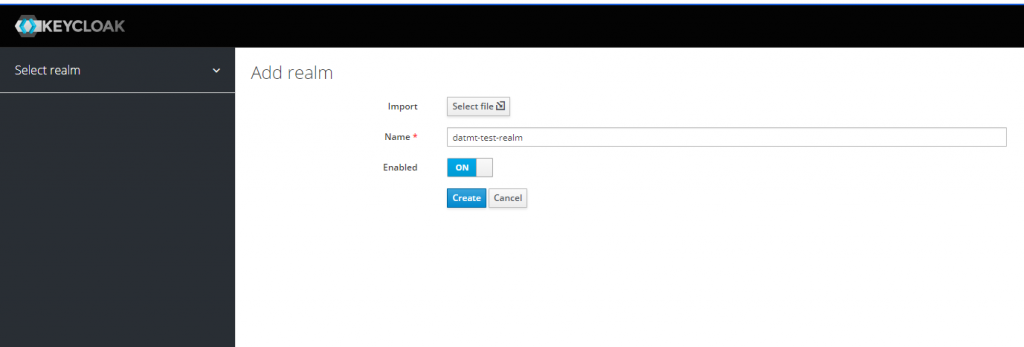
In the beginning, there should be only one realm, you need to click on Add realm to create a new realm.
Now the keycloak instance is ready. It’s time to create and configure a client.
Keycloak client configuration
The client’s configuration is very important so you need to pay close attention to this part.
At the beginning, there are some default clients:
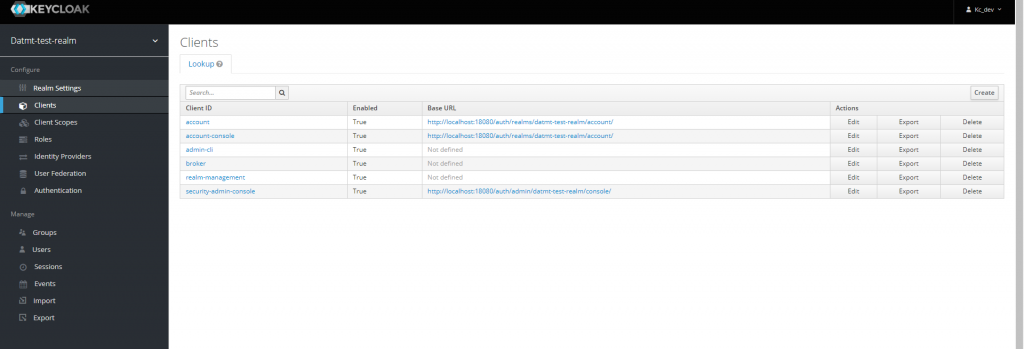
You can click on the Create button on the right to create a new client like this:
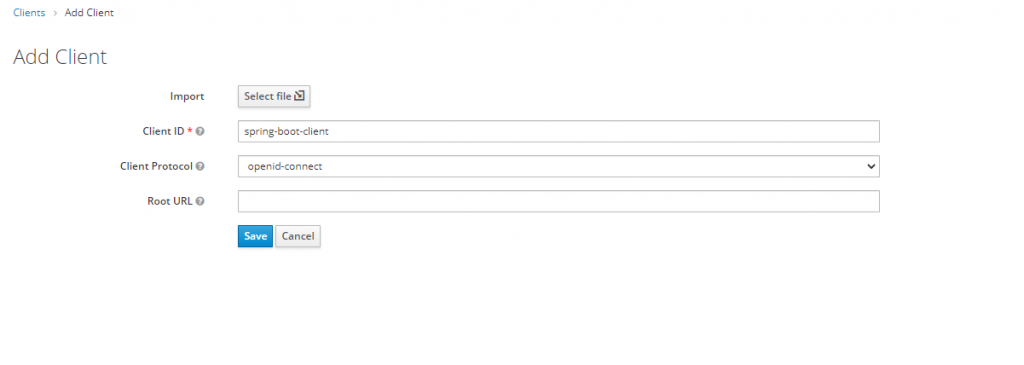
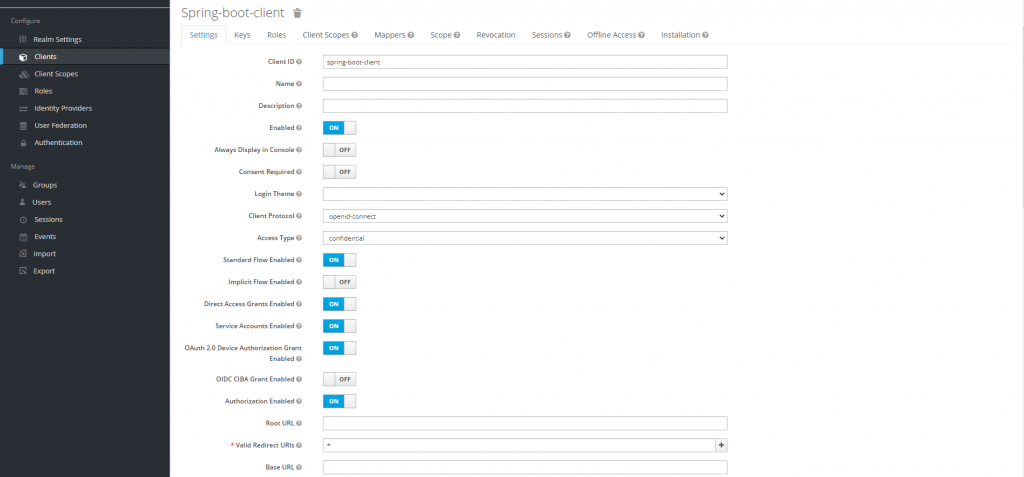
And configure the client like this:
Now, it’s time to create roles for the client. As you can remember, we have three roles:
- admin
- moderator
- member
From the requirement at the beginning, we know that admin and moderator are composite roles while member is not a composite role.
A composite role is a role that consists of one or
more other roles
Let’s switch to the Roles tab and click on Add role
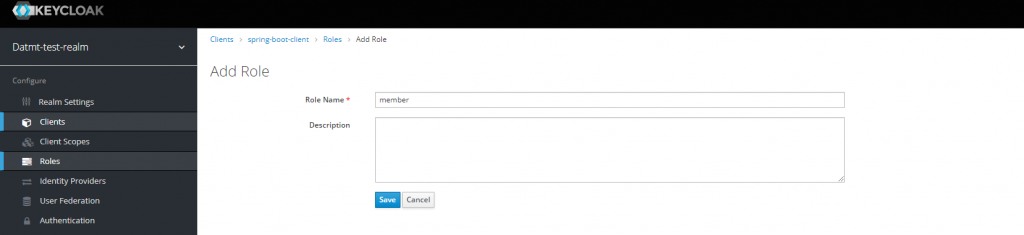
After creating the role, you will see there is a switch to turn that role into a composite role. For the member role, we don’t need that.
However, as mentioned above, admin and moderator are composite roles, we need to turn that option on:

As you can see in this case, when creating moderator role, I turned the composite role on. In the Client roles select box, I select this client (spring-boot-client).
Let’s do the same for the admin role.
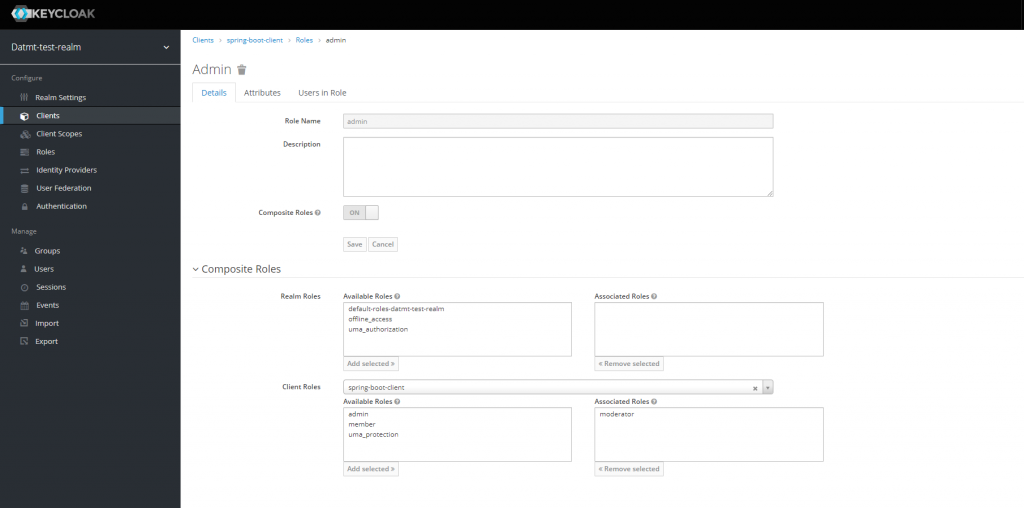
You don’t need to add the member role to the associated roles box since moderator includes member already.
Spring boot application configuration
Let’s configure the application.properties file.
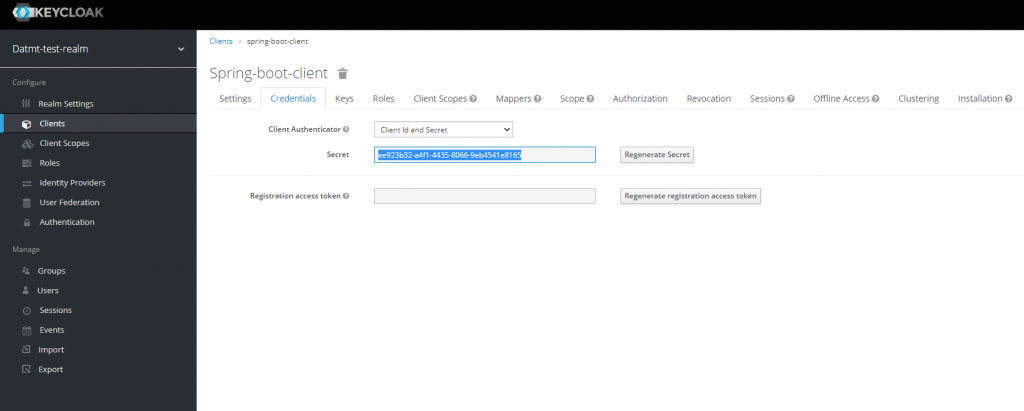
#keycloak
keycloak.realm=datmt-test-realm
keycloak.auth-server-url=http://localhost:18080/auth/
#use external in production
keycloak.ssl-required=none

#name of the client
keycloak.resource=spring-boot-client
keycloak.credentials.secret=ee923b32-a4f1-4435-8066-9eb4541e8165
keycloak.use-resource-role-mappings=true
keycloak.bearer-only=true
All the fields in this configuration file are self-explanatory. You may wonder where to get the secret? It’s in the Credentials tab of the client:
Also, for Keycloak to guard your endpoints, you need to create a configuration file like this:
package com.datmt.keycloak.springbootauth.config;

import org.keycloak.adapters.KeycloakConfigResolver;
import org.keycloak.adapters.springboot.KeycloakSpringBootConfigResolver;
import org.keycloak.adapters.springsecurity.authentication.KeycloakAuthenticationProvider;
import org.keycloak.adapters.springsecurity.config.KeycloakWebSecurityConfigurerAdapter;
import org.springframework.beans.factory.annotation.Autowired;
import org.springframework.context.annotation.Bean;
import org.springframework.context.annotation.Configuration;
import org.springframework.security.config.annotation.authentication.builders.AuthenticationManagerBuilder;
import org.springframework.security.config.annotation.method.configuration.EnableGlobalMethodSecurity;
import org.springframework.security.config.annotation.web.builders.HttpSecurity;
import org.springframework.security.config.annotation.web.configuration.EnableWebSecurity;
import org.springframework.security.core.authority.mapping.SimpleAuthorityMapper;
import org.springframework.security.core.session.SessionRegistryImpl;
import org.springframework.security.web.authentication.session.RegisterSessionAuthenticationStrategy;
import org.springframework.security.web.authentication.session.SessionAuthenticationStrategy;

@Configuration
@EnableWebSecurity
@EnableGlobalMethodSecurity(prePostEnabled = true, securedEnabled = true, jsr250Enabled = true)
public class KeycloakSecurityConfig extends KeycloakWebSecurityConfigurerAdapter {

    @Override
    protected void configure(HttpSecurity http) throws Exception {
        super.configure(http);
        http.authorizeRequests()
            .antMatchers("/public/**").permitAll()
            .antMatchers("/member/**").hasAnyRole("member")
            .antMatchers("/moderator/**").hasAnyRole("moderator")
            .antMatchers("/admin/**").hasAnyRole("admin")
            .anyRequest()
            .permitAll();
        http.csrf().disable();
    }

    @Autowired
    public void configureGlobal(AuthenticationManagerBuilder auth) throws Exception {
        KeycloakAuthenticationProvider keycloakAuthenticationProvider = keycloakAuthenticationProvider();
        keycloakAuthenticationProvider.setGrantedAuthoritiesMapper(new SimpleAuthorityMapper());
        auth.authenticationProvider(keycloakAuthenticationProvider);
    }

    @Bean
    @Override
    protected SessionAuthenticationStrategy sessionAuthenticationStrategy() {
        return new RegisterSessionAuthenticationStrategy(new SessionRegistryImpl());
    }

    @Bean
    public KeycloakConfigResolver KeycloakConfigResolver() {
        return new KeycloakSpringBootConfigResolver();
    }
}
Here, you can see that I’ve configured that:
- Paths begins with
/adminrequrieadminrole - Paths begin with
/memberrequirememberrole - Paths begin with
/moderatorrequiremoderatorrole - Paths begin with
/publicis accessible by all
Let’s create a controller and test our config:
package com.datmt.keycloak.springbootauth.controller;

import org.springframework.http.ResponseEntity;
import org.springframework.web.bind.annotation.GetMapping;
import org.springframework.web.bind.annotation.RequestHeader;
import org.springframework.web.bind.annotation.RequestMapping;
import org.springframework.web.bind.annotation.RequestMethod;
import org.springframework.web.bind.annotation.RestController;
import javax.annotation.security.RolesAllowed;

@RestController
public class HelloController {

	@GetMapping("/public/hello")
	public ResponseEntity<String> helloPublic() {
		return ResponseEntity.ok("Hello public user");
	}

	@GetMapping("/member/hello")
	public ResponseEntity<String> helloMember() {
		return ResponseEntity.ok("Hello dear member");
	}

	@GetMapping("/moderator/hello")
	public ResponseEntity<String> helloModerator() {
		return ResponseEntity.ok("Hello Moderator");
	}


	@GetMapping("/admin/hello")
	public ResponseEntity<String> helloAdmin() {
		return ResponseEntity.ok("Nice day, admin");
	}


}
Let’s try the public endpoint:
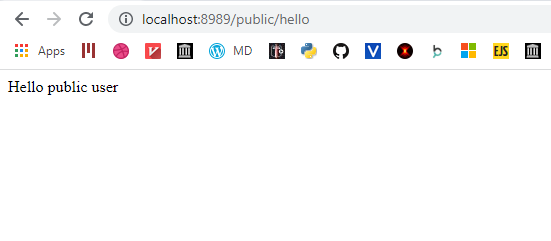
As you can see, it works as expected. The path begins with /public so anyone can access without any authentication.
Now let’s try the path for member:
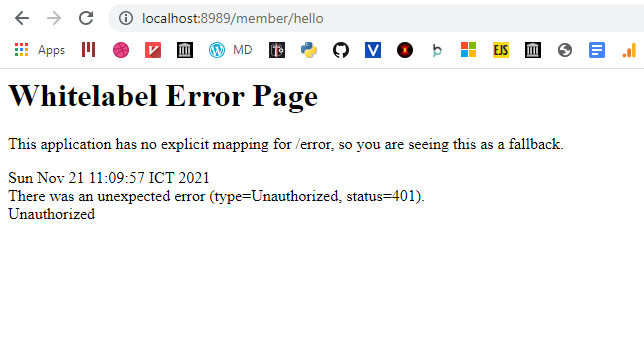
and also admin:
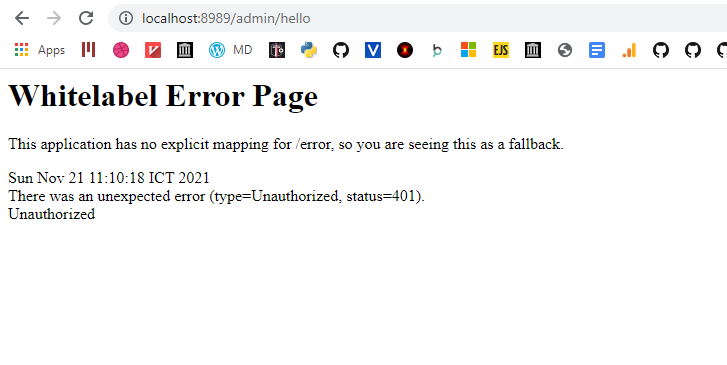
You can see that since the request didn’t present any kind of credentials, the response is 401.
To make sure this works, let’s create users with specific roles and test if they can access the endpoints with his token.
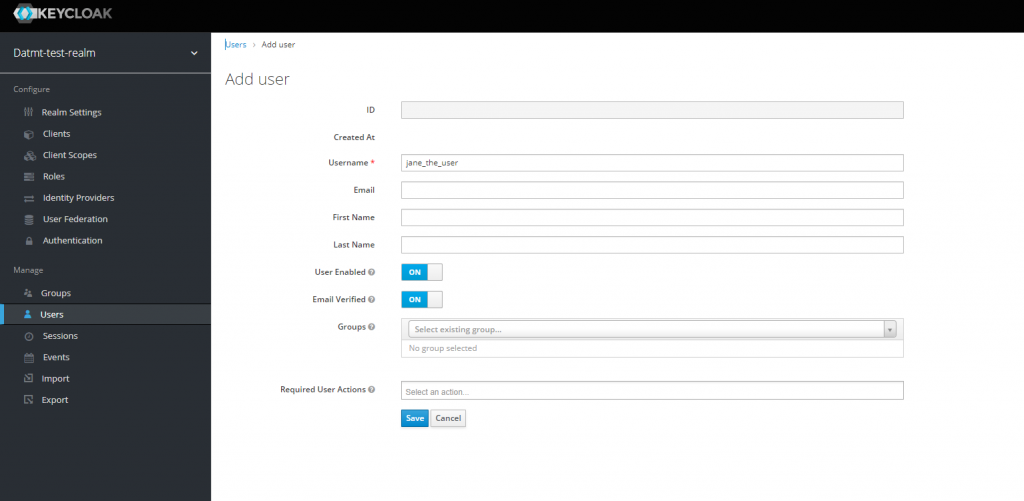
Let’s first create an user with member role:
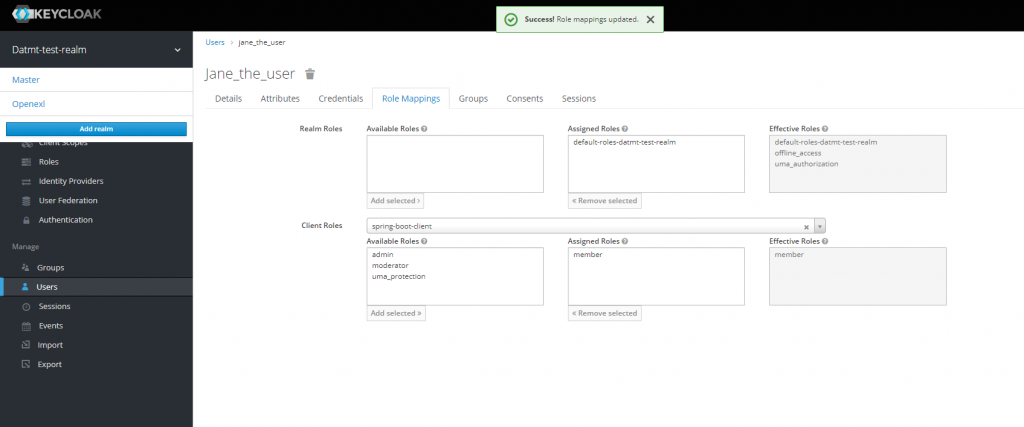
After creating the user, go to Role Mappings tab, select spring-boot-client and add member to user’s list of roles
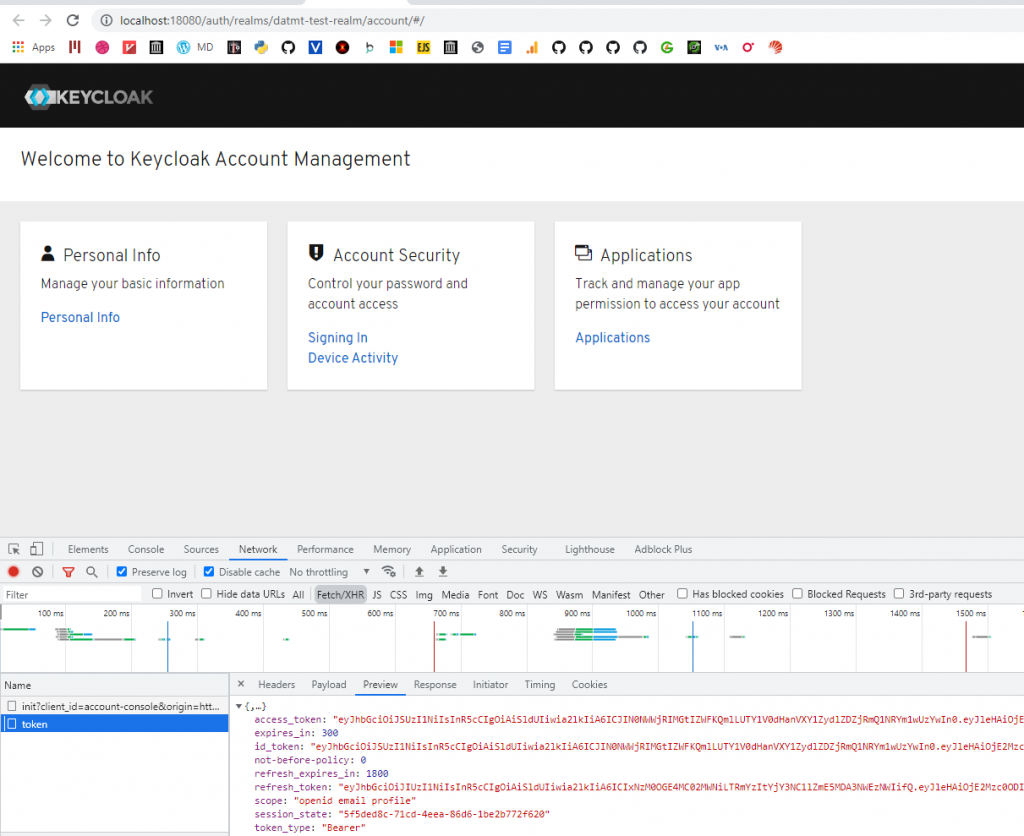
Now, to quickly get the token for this user, go back to the details tab and click on Impersonate:
In the new tab that appears, open the network tab of the developer console, reload and copy the access token:
Now, use that token to make a request in postman:
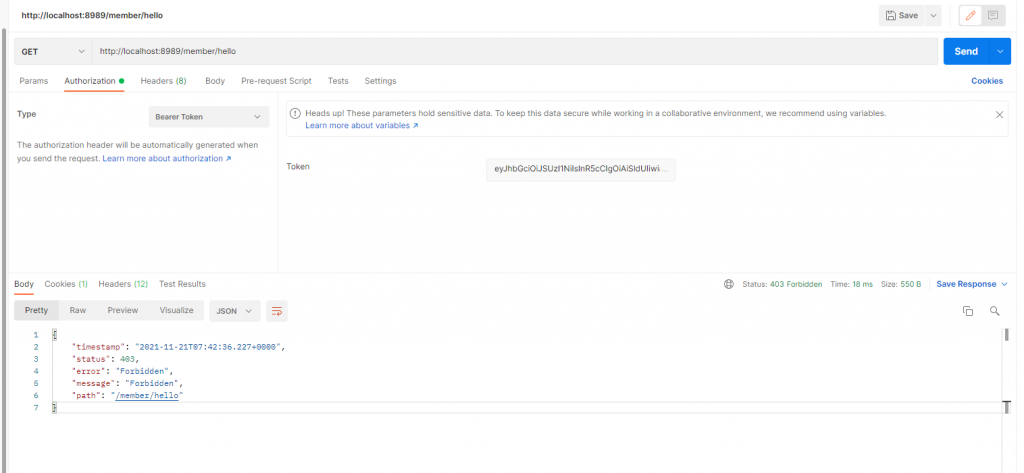
You expected that to be a 200 response, right? But what I got was 403. That’s better than 401 since we can authenticate with the token but somehow, the user was not authorized to access the endpoint.
What’s the missing configuration?
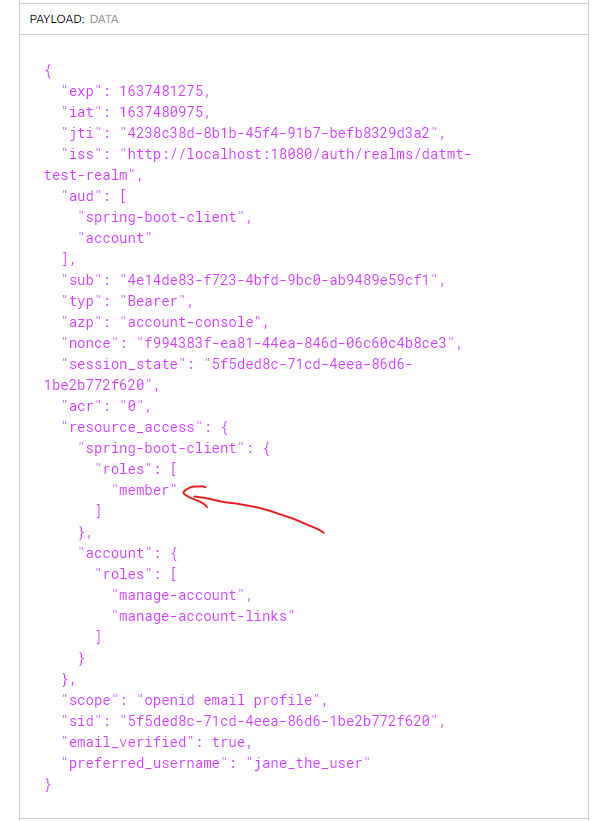
If you decode the token using sites like jwt.io, you will see that even though the user has role member, it didn’t show in the token:
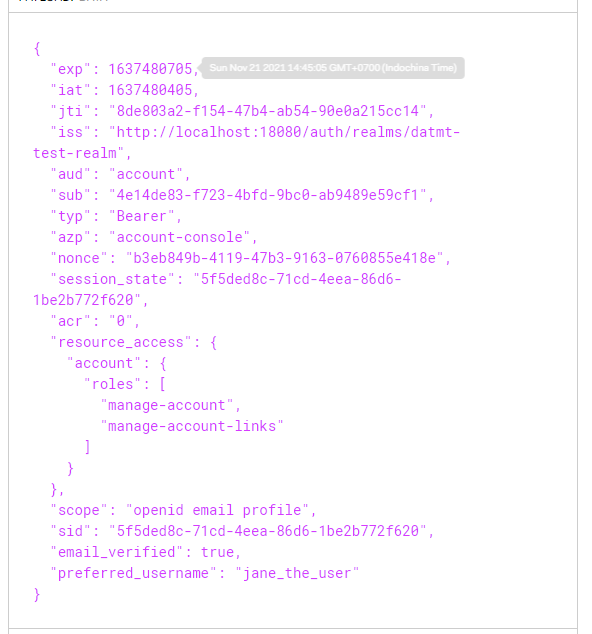
It turned out, you also need to configure client scopes so the roles appear on the token.
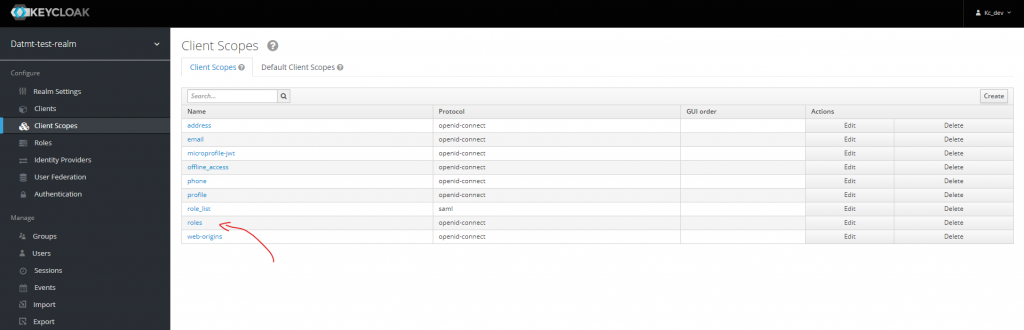
Then go to Scopes and add all roles of the client spring-boot-client
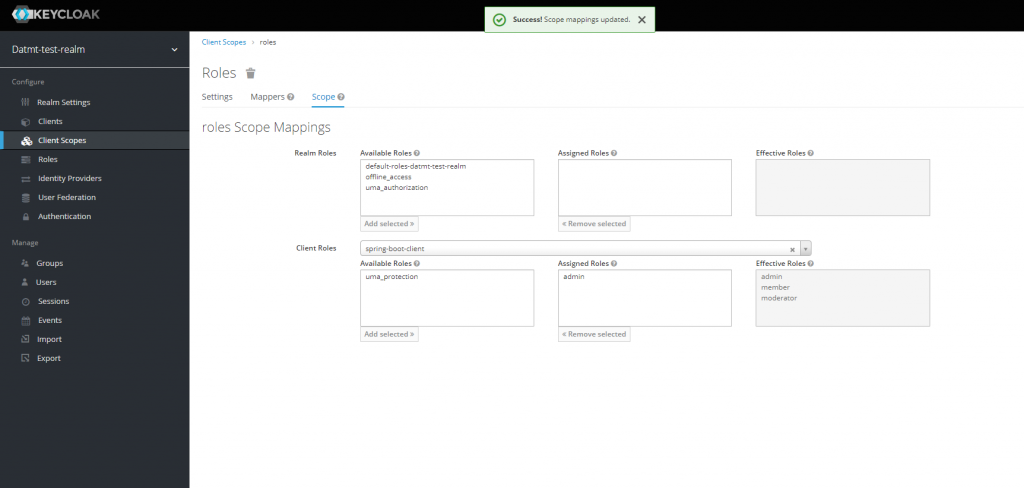
Now, let’s impersonate the user again. Now, her roles should be visible on the token decoding page:
Let’s make the same request to them member’s endpoint again but with the new token, sure enough, it worked:
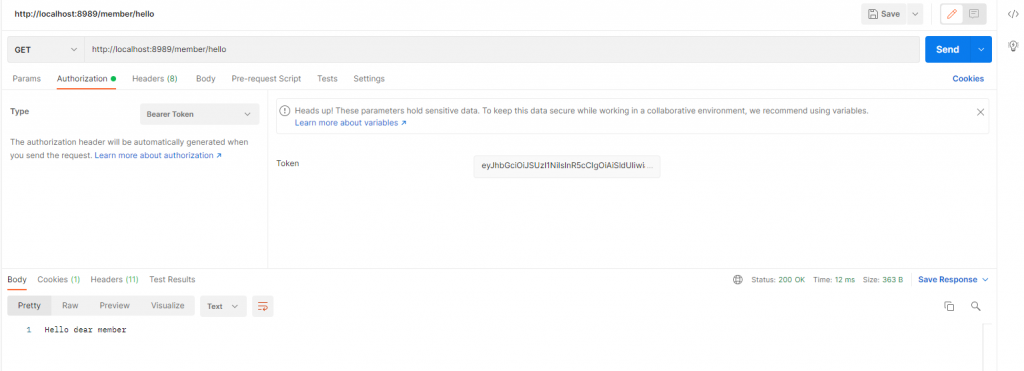
You can try with other roles, they should work too.
Guarding API with RolesAllowed
Guarding endpoint with path prefixes is OK and sometimes that’s a clean solution. However, there are times you may need a finer tune to your access policy.
In such case, you can use RolesAllowed to specify which role can access a specific endpoint, no matter what its path prefix is.
	@RolesAllowed("member")
	@GetMapping("/other/hello")
	public ResponseEntity<String> helloCustom() {
		return ResponseEntity.ok("Nice day, my custom user");
	}
You can guess from the annotation, anyone with role member can access this endpoint.
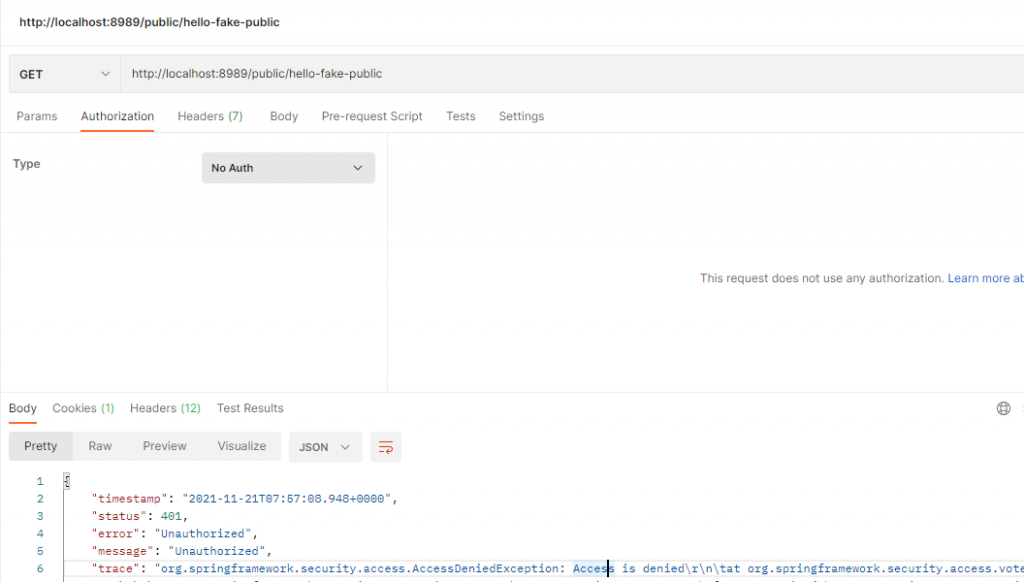
What if the path is prefix but /public?
	@RolesAllowed("member")
	@GetMapping("/public/hello-fake-public")
	public ResponseEntity<String> helloCustom() {
		return ResponseEntity.ok("Nice day, it appears to be public but not");
	}
If you try to access the URL, even though the prefix is public, you will get a 401 without a token:
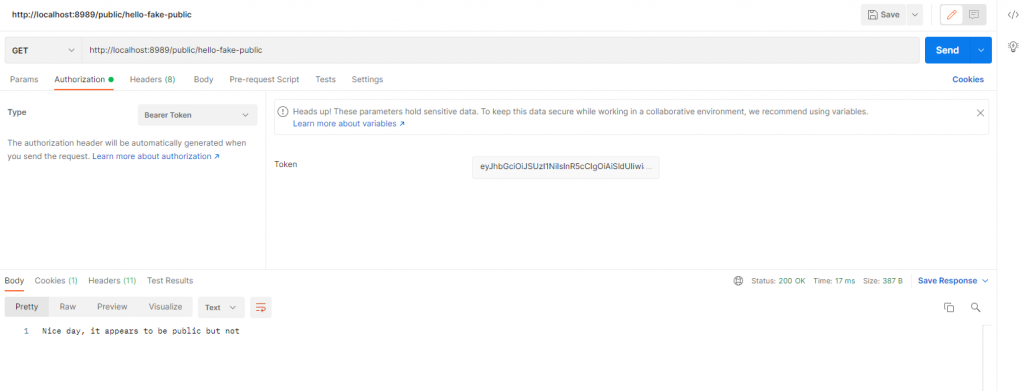
But if a user with member role, the access is granted:
Create account and login using Keycloak Admin Client
Now the API can talk to keycloak to authenticate and authorize users, let’s also integrate user login and creation to the API so we can get the token via the API.
Before doing anything with the code, let’s add some more configuration to the client so it has what it needs to manage user.
First, go to the client’s Service Account Role tab and configure as follow:
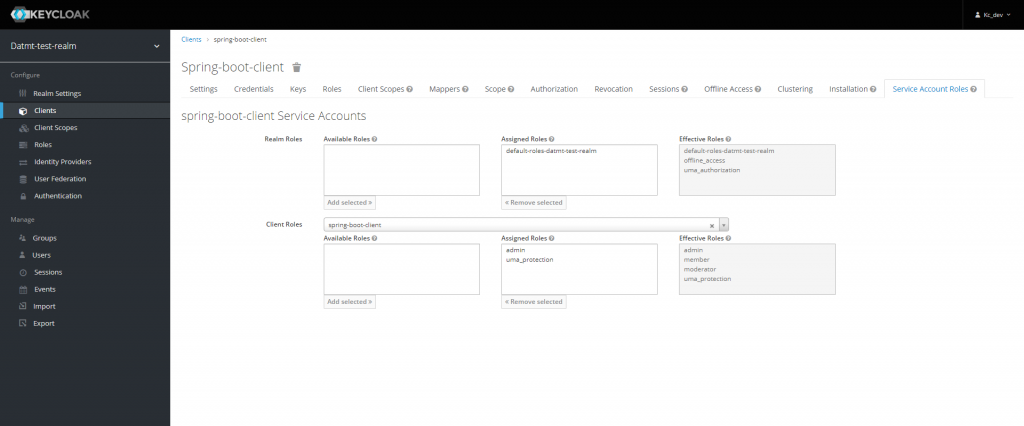
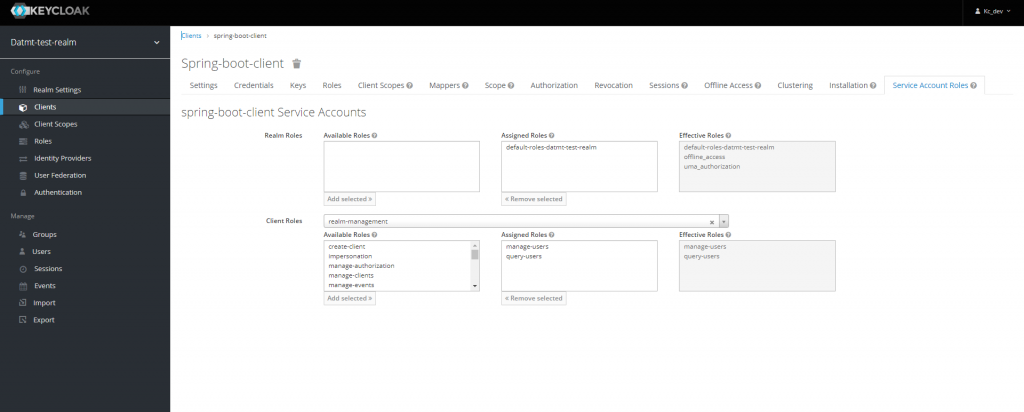
Now, the client is able to manage users.
Let’s add the keycloak-admin-client package to maven. You need this to enable spring boot to operate Keycloak’s admin-related tasks.
		<dependency>
			<groupId>org.keycloak</groupId>
			<artifactId>keycloak-admin-client</artifactId>
			<version>${keycloak.version}</version>
		</dependency>
Next add a KeycloakProvider class:
@Configuration
@Getter
public class KeycloakProvider {

    @Value("${keycloak.auth-server-url}")
    public String serverURL;
    @Value("${keycloak.realm}")
    public String realm;
    @Value("${keycloak.resource}")
    public String clientID;
    @Value("${keycloak.credentials.secret}")
    public String clientSecret;

    private static Keycloak keycloak = null;

    public KeycloakProvider() {
    }

    public Keycloak getInstance() {
        if (keycloak == null) {

            return KeycloakBuilder.builder()
                    .realm(realm)
                    .serverUrl(serverURL)
                    .clientId(clientID)
                    .clientSecret(clientSecret)
                    .grantType(OAuth2Constants.CLIENT_CREDENTIALS)
                    .build();
        }
        return keycloak;
    }


    public KeycloakBuilder newKeycloakBuilderWithPasswordCredentials(String username, String password) {
        return KeycloakBuilder.builder() //
                .realm(realm) //
                .serverUrl(serverURL)//
                .clientId(clientID) //
                .clientSecret(clientSecret) //
                .username(username) //
                .password(password);
    }

    public JsonNode refreshToken(String refreshToken) throws UnirestException {
        String url = serverURL + "/realms/" + realm + "/protocol/openid-connect/token";
        return Unirest.post(url)
                .header("Content-Type", "application/x-www-form-urlencoded")
                .field("client_id", clientID)
                .field("client_secret", clientSecret)
                .field("refresh_token", refreshToken)
                .field("grant_type", "refresh_token")
                .asJson().getBody();
    }
}
Then a service to create and log in user:
@Service
public class KeycloakAdminClientService {
    @Value("${keycloak.realm}")
    public String realm;

    private final KeycloakProvider kcProvider;


    public KeycloakAdminClientService(KeycloakProvider keycloakProvider) {
        this.kcProvider = keycloakProvider;
    }

    public Response createKeycloakUser(CreateUserRequest user) {
        UsersResource usersResource = kcProvider.getInstance().realm(realm).users();
        CredentialRepresentation credentialRepresentation = createPasswordCredentials(user.getPassword());

        UserRepresentation kcUser = new UserRepresentation();
        kcUser.setUsername(user.getEmail());
        kcUser.setCredentials(Collections.singletonList(credentialRepresentation));
        kcUser.setFirstName(user.getFirstname());
        kcUser.setLastName(user.getLastname());
        kcUser.setEmail(user.getEmail());
        kcUser.setEnabled(true);
        kcUser.setEmailVerified(false);
        return usersResource.create(kcUser);

    }

    private static CredentialRepresentation createPasswordCredentials(String password) {
        CredentialRepresentation passwordCredentials = new CredentialRepresentation();
        passwordCredentials.setTemporary(false);
        passwordCredentials.setType(CredentialRepresentation.PASSWORD);
        passwordCredentials.setValue(password);
        return passwordCredentials;
    }


}
Finally, create a controller to create and login user:
@RestController
@RequestMapping("/user")
public class UserController {
    private final KeycloakAdminClientService kcAdminClient;

    private final KeycloakProvider kcProvider;

    private static final Logger LOG = org.slf4j.LoggerFactory.getLogger(UserController.class);


    public UserController(KeycloakAdminClientService kcAdminClient, KeycloakProvider kcProvider) {
        this.kcProvider = kcProvider;
        this.kcAdminClient = kcAdminClient;
    }


    @PostMapping(value = "/create")
    public ResponseEntity<Response> createUser(@RequestBody CreateUserRequest user) {
        Response createdResponse = kcAdminClient.createKeycloakUser(user);
        return ResponseEntity.ok(createdResponse);

    }

    @PostMapping("/login")
    public ResponseEntity<AccessTokenResponse> login(@NotNull @RequestBody LoginRequest loginRequest) {
        Keycloak keycloak = kcProvider.newKeycloakBuilderWithPasswordCredentials(loginRequest.getUsername(), loginRequest.getPassword()).build();

        AccessTokenResponse accessTokenResponse = null;
        try {
            accessTokenResponse = keycloak.tokenManager().getAccessToken();
            return ResponseEntity.status(HttpStatus.OK).body(accessTokenResponse);
        } catch (BadRequestException ex) {
            LOG.warn("invalid account. User probably hasn't verified email.", ex);
            return ResponseEntity.status(HttpStatus.FORBIDDEN).body(accessTokenResponse);
        }

    }

}
Too much code? No worries, they are all available on Github.
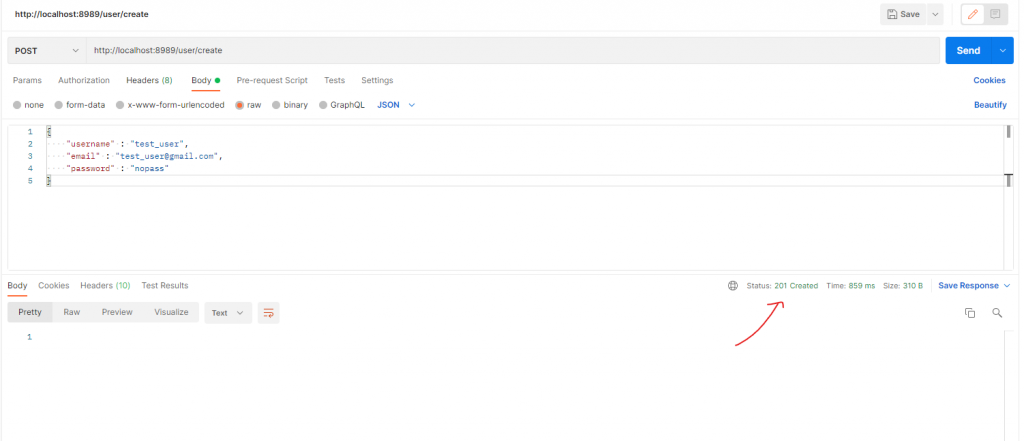
Now, open postman and call these endpoints. First, create a user:
If you login with that user now, you will get an error since the user hasn’t got email verified:
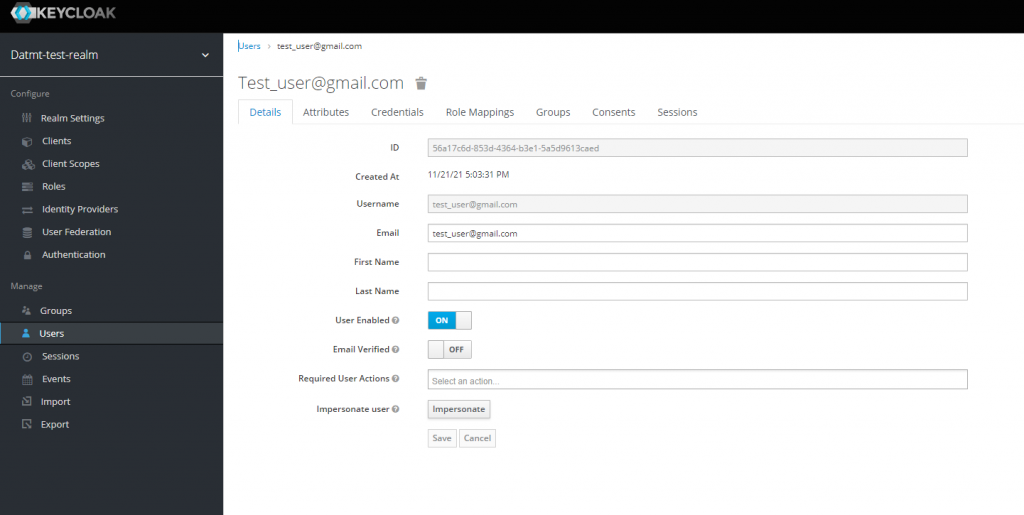
Simply switch email verified on then y ou can get the tokens:
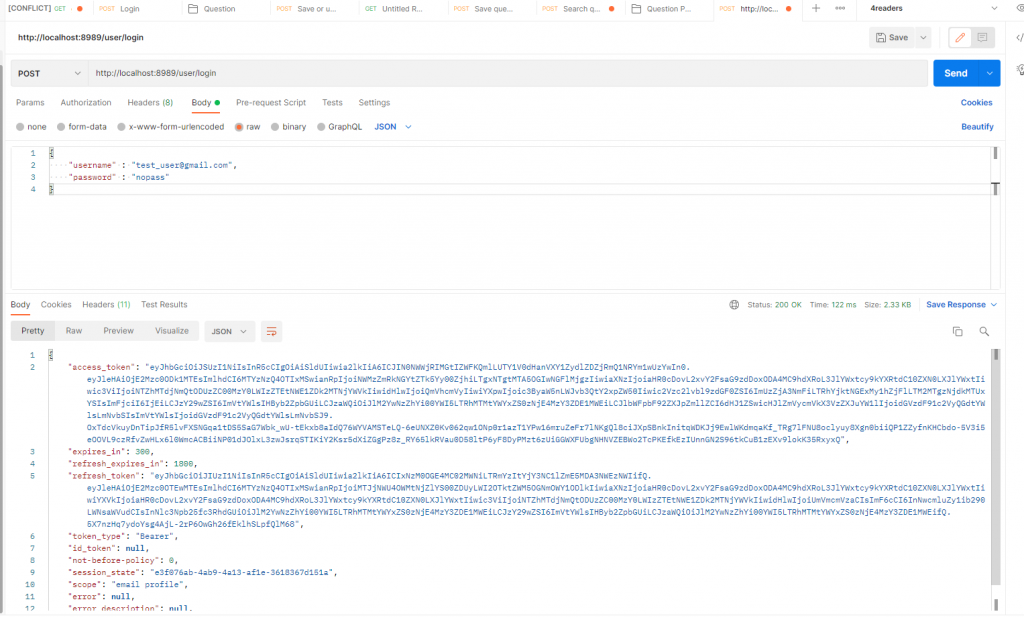
Notice that you need to put email in the place of user name because, by default, email is used as username:
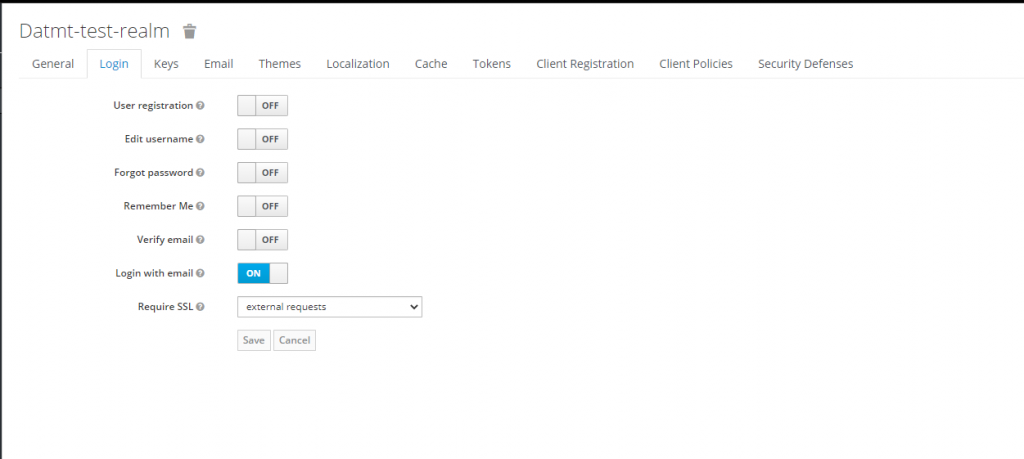
Obviously, you can turn this off to log in with the username.
Conclusion
In this super long post, I created a project that help you to quickly configure keycloak with your spring boot app. You can now use this project as a base and start creating your app’s business logic.
Code repo is here: https://github.com/datmt/Keycloak-Spring-Boot-Login-Create-User

I build softwares that solve problems. I also love writing/documenting things I learn/want to learn.
Thank you very much for this Tutorial – this is exactly what I was looking for! Great Job!
You’re welcome, Felix 🙂
Great Job bro!!! Some screens may have been changed in the current version but it’s really helpful for me. Thank you very much.
My pleasure :). Let me check with newer keycloak version and make an update, if possible.
Great job on your article. I have a problem with setting up the keycloak provider to save a user on the version 19.0.2
find below the error am facing i may be missing a step or i did not properly set up my service class
DEBUG [org.keycloak.services.error.KeycloakErrorHandler] (executor-thread-1) Error response 401: javax.ws.rs.NotAuthorizedException: HTTP 401 Unauthorized
at org.keycloak.services.resources.admin.AdminRoot.authenticateRealmAdminRequest(AdminRoot.java:161)
at org.keycloak.services.resources.admin.AdminRoot.getRealmsAdmin(AdminRoot.java:205)
at jdk.internal.reflect.GeneratedMethodAccessor126.invoke(Unknown Source)
at java.base/jdk.internal.reflect.DelegatingMethodAccessorImpl.invoke(DelegatingMethodAccessorImpl.java:43)
at java.base/java.lang.reflect.Method.invoke(Method.java:566)
happend same to me , i cant create a user, returns 401.
Thank you for the tutorial. It has solved my problem. But I would like to ask how can I add a role to the user when creating a user through Spring.
Hi Fatih,
You can configure the client to have manage-users role in realm-management. Then, you can add attributes to users
Add this code to execution after 201
log.info(“User creation successfull “);
String userId = CreatedResponseUtil.getCreatedId(response);
log.info(“Created user id = “+userId);
// Define password credential
CredentialRepresentation passwordCred = new CredentialRepresentation();
passwordCred.setTemporary(false);
passwordCred.setType(CredentialRepresentation.PASSWORD);
passwordCred.setValue(user.getPassword());
UserResource userResource = usersResource.get(userId);
// Set password credential
userResource.resetPassword(passwordCred);
// Get client
ClientRepresentation app1Client = realmResource.clients() //
.findByClientId(“your-client-name”).get(0); // Get this from configuration
// Get client level role (requires view-clients role)
RoleRepresentation userClientRole = realmResource.clients().get(app1Client.getId()) //
.roles().get(“member”).toRepresentation(); // role name in this case is member
// Assign client level role to user
userResource.roles().clientLevel(app1Client.getId()).add(Arrays.asList(userClientRole));
Exactly what i was searching for. Best article about this. Many thanks!!
How about if we are using Spring Boot 3?
There are so many deprecated classes.
Is it still OK?
Thanks
here you go: https://datmt.com/backend/java/integrate-keycloak-with-spring-boot-3/
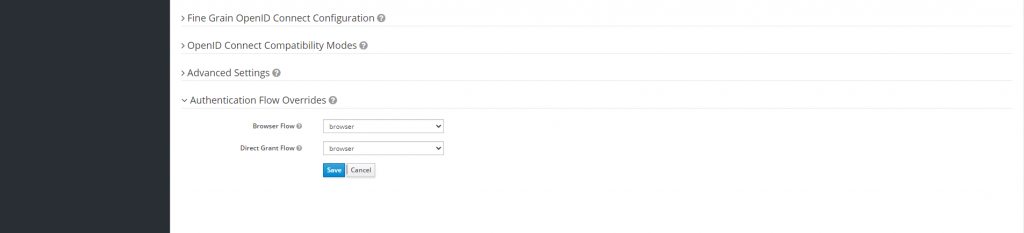
Inside client -> Authentication Flow Overrides properties -> Keep the value of Direct Grant Flow as Direct Grant Flow. Where in the screenshot you mentioned, it’s selected as Browser for both the fields.
Thanks a lot for this amazing article, I just want to receive the email but nothing happened
Notice: I configure my email setting like SMTP host and port…
Probably you need to test if your SMTP settings is correct
Great description of the role based authorization. I followed step by step but I am getting 403 forbidden error while creating user from postman
Have you configured the role of the service account to be able to create users?
Hey, I’m facing the same issue. Can you please tell us in detail bout this problem (403)?
Probably you haven’t assign the realm management roles for the service account.
Great work, step by step guide helped a lot.
Thanks, very great work.