
Table of Contents
Overview
Today, I will show you how to configure Angular with Keycloak. I’m running Angular 14 and Keycloak 12.0.4 on Docker.
However, this should work with other setups. If not, please post a comment.
Let’s get started.
Configure Keycloak client
Let’s get started creating a Keycloak client.
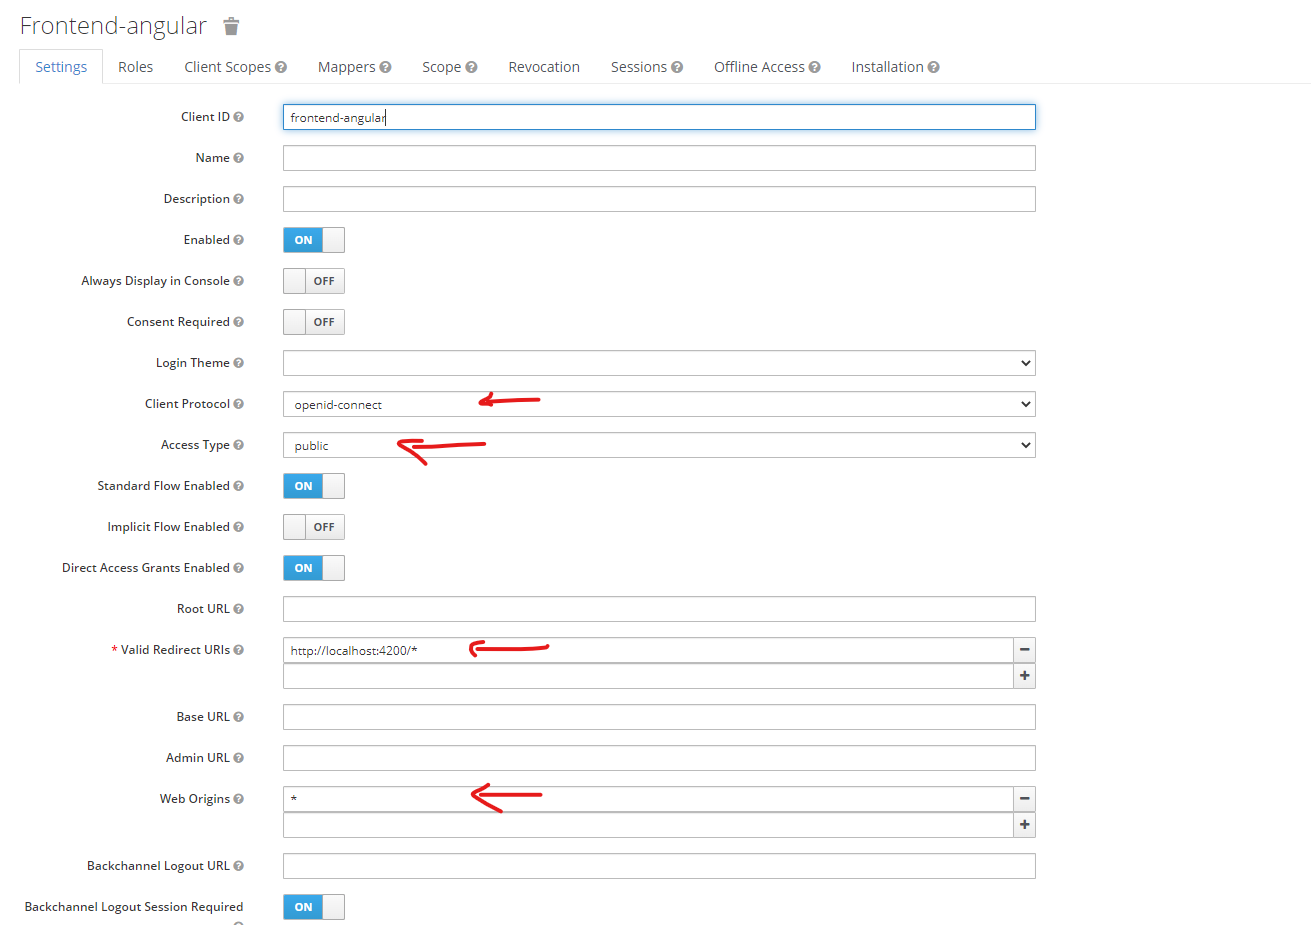
There are a few settings you need to pay attention to here:
- Client protocol: openid-connect
- Access type: public
- Valid Redirect URL: your app URL, you can add multiple URLs here by using the + button on the right. On the dev environment, put
http://localhost:4200or whatever your URL is - Web Origin: for development purposes, put
*. On prod, make sure to put your app URL only.
That’s it!
Configure Angular to work with keycloak
Now it’s time to configure settings in Angular.
Install dependencies
First, install keycloak-js and keycloak-angular. More details on keycloak-angular can be found here on npm: https://www.npmjs.com/package/keycloak-angular.
npm install keycloak-angular keycloak-js
Create a file to check with Keycloak
Under the assets folder, create a file named silent-check-sso.html with the following content:
<html>
<body>
<script>
    parent.postMessage(location.href, location.origin);
</script>
</body>
</html>
Create Auth-guard
Now let’s create a route guard that checks with Keycloak.
First, generate a service:
npm run ng g s auth-guard
This will create a service. Here is the content you need to put in auth-guard.service.ts
import { Injectable } from '@angular/core';
import {
  ActivatedRouteSnapshot,
  Router,
  RouterStateSnapshot,
} from '@angular/router';
import { KeycloakAuthGuard, KeycloakService } from 'keycloak-angular';

@Injectable({
  providedIn: 'root',
})
export class AuthGuard extends KeycloakAuthGuard {
  constructor(
    protected override readonly router: Router,
    protected readonly keycloak: KeycloakService
  ) {
    super(router, keycloak);
  }

  override roles: any;
  public async isAccessAllowed(
    route: ActivatedRouteSnapshot,
    state: RouterStateSnapshot
  ) {
    // Force the user to log in if currently unauthenticated.
    if (!this.authenticated) {
      await this.keycloak.login({
        redirectUri: window.location.origin + state.url,
      });
    }

    // Get the roles required from the route.
    const requiredRoles = route.data['roles'];

    // Allow the user to proceed if no additional roles are required to access the route.
    if (!(requiredRoles instanceof Array) || requiredRoles.length === 0) {
      return true;
    }

    // Allow the user to proceed if all the required roles are present.
    return requiredRoles.every((role) => this.roles.includes(role));
  }
}
In app.module.ts, put the following code:
import { APP_INITIALIZER } from '@angular/core';
import { KeycloakAngularModule, KeycloakService } from 'keycloak-angular';

//... more code

function initializeKeycloak(keycloak: KeycloakService) {
  return () =>
    keycloak.init({
      config: {
        url: 'https://sso.openexl.com/auth/',
        realm: 'license-server-dev',
        clientId: 'frontend-angular'
      },
      initOptions: {
        onLoad: 'check-sso',
        silentCheckSsoRedirectUri:
          window.location.origin + '/assets/silent-check-sso.html'
      }
    });
}


@NgModule({
  imports: [
    // ... more imports..
    KeycloakAngularModule
  ],
  declarations: [AppComponent],
  bootstrap: [AppComponent],
  providers: [
    //put this
    {
      provide: APP_INITIALIZER,
      useFactory: initializeKeycloak,
      multi: true,
      deps: [KeycloakService]
    }
    //end keycloak
  ]
})
Finally, let’s put the AuthGuard in the router configuration:
  {
    path: 'feature-list',
    canActivate: [AuthGuard], // <-- put the guard here
    loadChildren: () =>
      import('./features/feature-list/feature-list.module').then(
        (m) => m.FeatureListModule
      )
  },
Now, you are done setting up. If you need a test user, check the next section.
Create a test user in Keycloak
Let’s head to Keycloak, select your realm and click on Users.

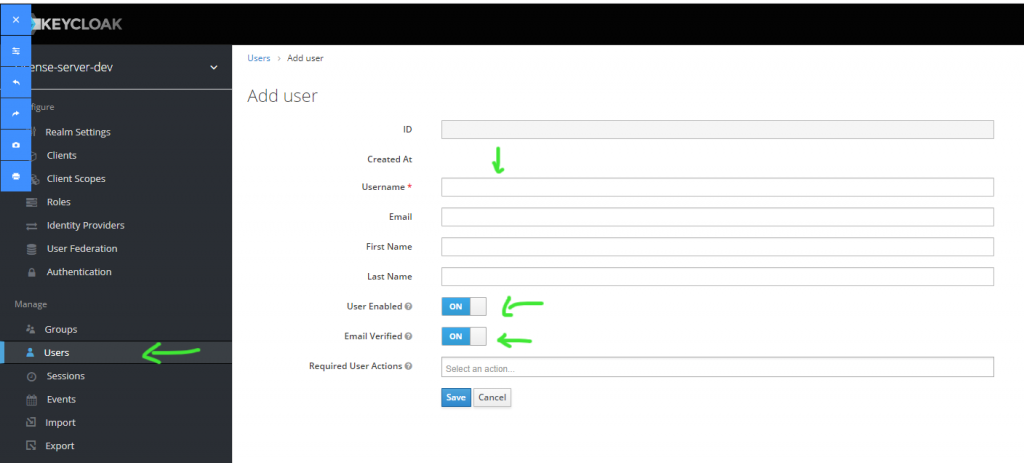
Enter the details in the required boxes and make sure the settings at green arrows are configured like so.
After creating the user, make sure to set the password:
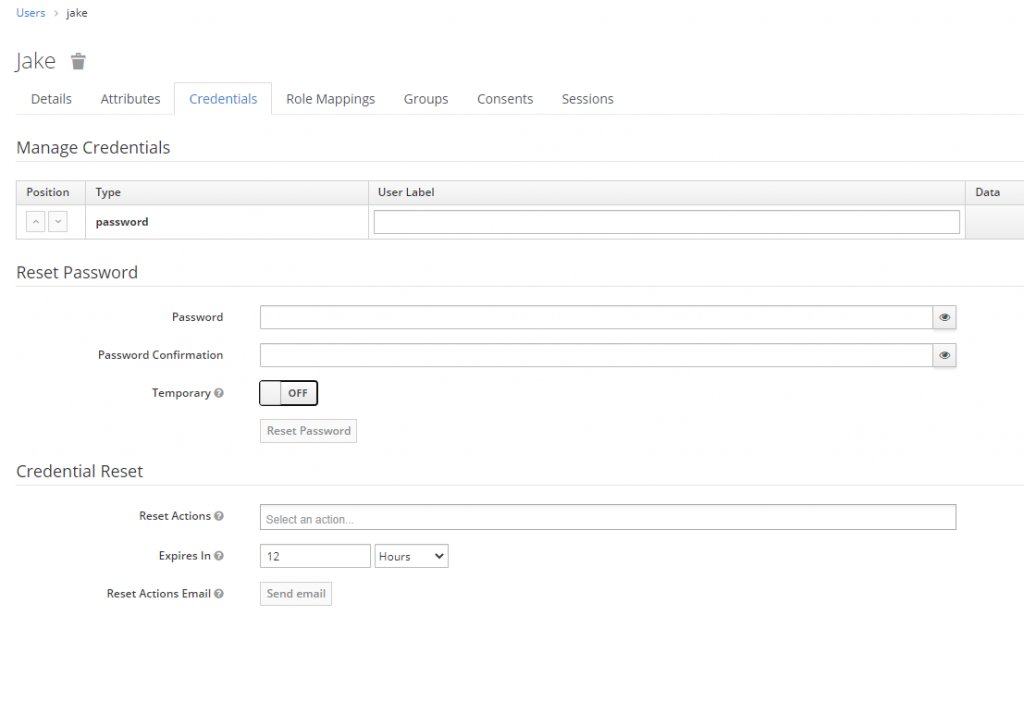
On this screen, make sure Temporary is OFF!
Save the user and you are ready to test the Angular – Keycloak integration.
Test the app
Let’s go to the guarded route, if the user is not logged in, you will be redirected to Keycloak:
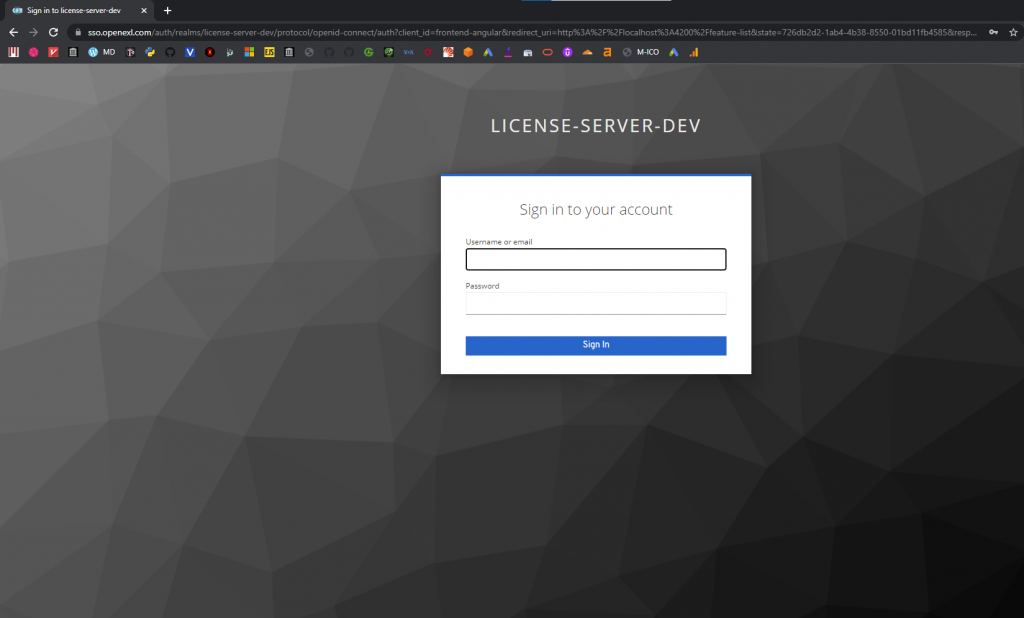
Enter your credentials and you will be redirected to the Angular app.
Troubleshooting
In my effort to do the Angular – Keycloak integration, I encountered a problem that made the app constantly redirect between angular and Keycloak. If you have the same issue, make sure initialNavigation is NOT set to enableBlocking:
    RouterModule.forRoot(routes, {
      anchorScrolling: 'enabled',
      initialNavigation: 'enabledNonBlocking', //<-- use this or remove this settings completely
    }),
Angular & Keycloak starter project
If you want to quickly scaffolding an Angular with Keycloak already integrated, check this repo out:
https://github.com/datmt/angular-ngrx-material-starter-with-keycloak
I created this to support my future web development. Big thanks to the creator of this repo: https://github.com/tomastrajan/angular-ngrx-material-starter
Conclusion
In this post, I showed you how to integrate Angular with Keycloak. You can now focus on creating the next big web app instead of fixing user authentication problems.

I build softwares that solve problems. I also love writing/documenting things I learn/want to learn.