Table of Contents
Overview
There are times you need to add custom claims from user attributes (to show on the user’s access token) in Keycloak. One possible reason is to extract information regarding the user programmatically.
In this post, I will show you how you can add custom claims from user attributes in Keycloak.
Adding attributes to a user
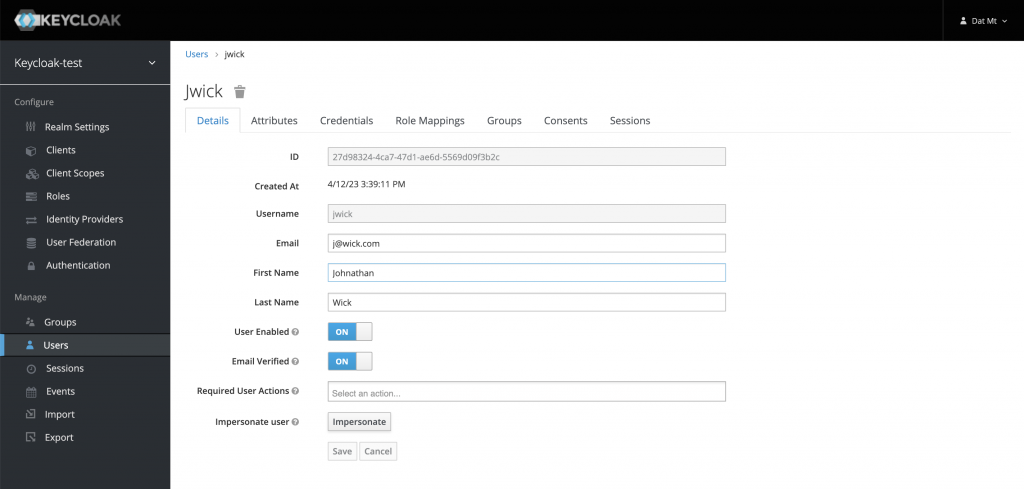
The first thing you need to do is to create a user on Keycloak (if you haven’t) and add your desired attributes to that user:
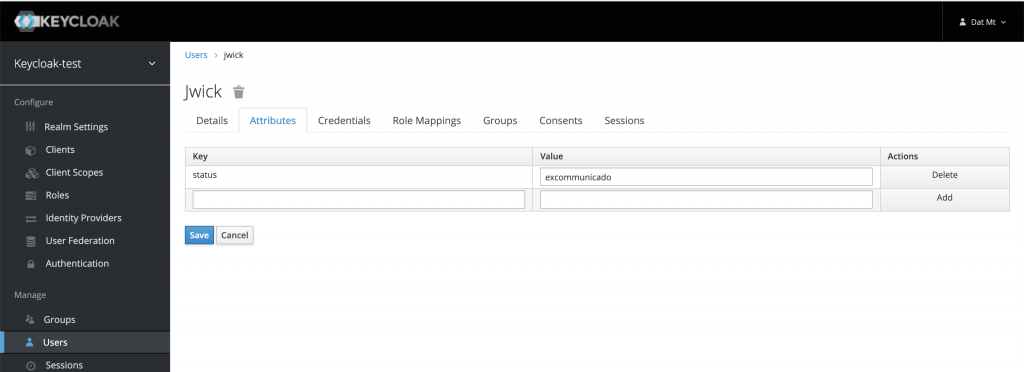
As you can see, in the screenshot, I added one attribute called status and set the value to excommunicado.
Make sure you click on the save button.
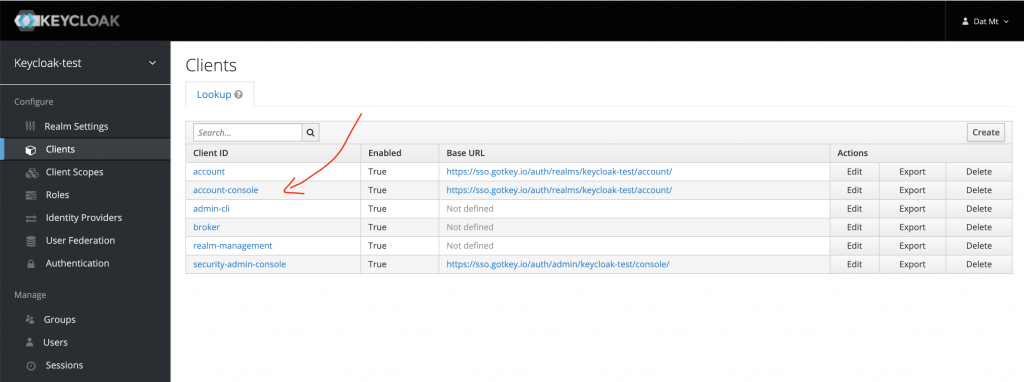
Next, you will need to add mappers to the account-console client. Remember, if you have other clients, you need to do the same steps from now on for that client.
I use the account-console client because I will use the impersonate feature to quickly get the token for the user (just for demonstration purposes)
Add mappers to account-console client
First, click on Clients and select account-console on the client list:
Next, click on the Mappers tab and then on the Create button:
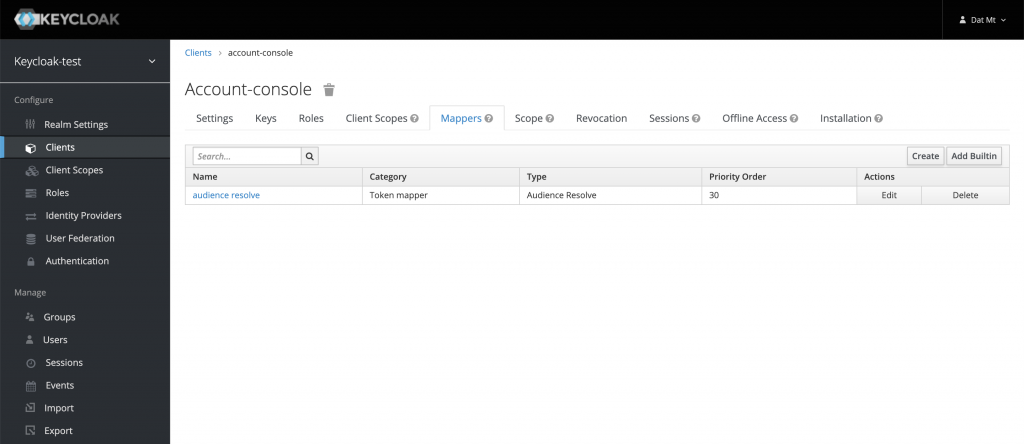
Then, you can configure the mapper as follow:
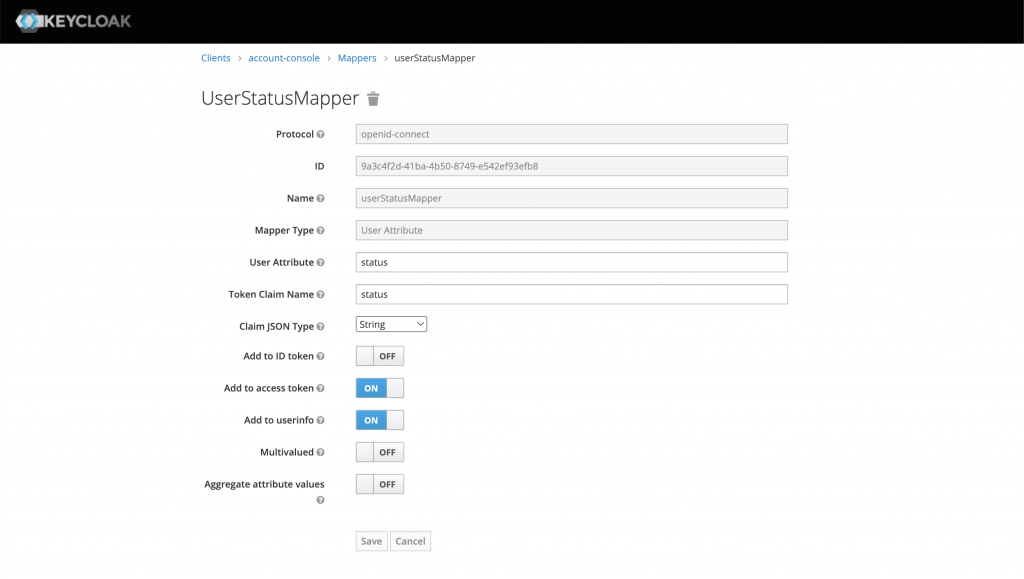
There is something in this screen you need to pay attention to:
- The Mapper Type must be User Attribute as you want to extract the value from the attribute you set previously
- The token claim name is the actual text that is displayed in the JWT token
- Claim json type: Depends on your application, however, in this case, it’s a string
- The toggle buttons are almost self-explanatory. If you turn the Multivalued option on, the value will be displayed inside a JSON array ([value])
Repeat the process with other attributes you want to add to the access token.
View the attributes in the access token
Let’s go back to the user and impersonate her to get a token:
On the next screen, open the developer console on your browser and copy the token:
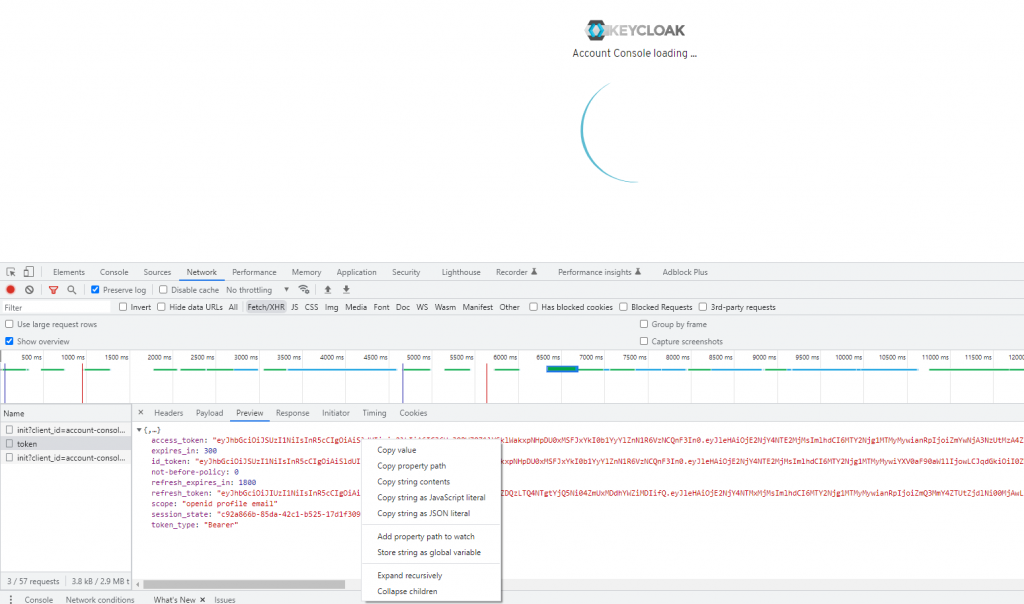
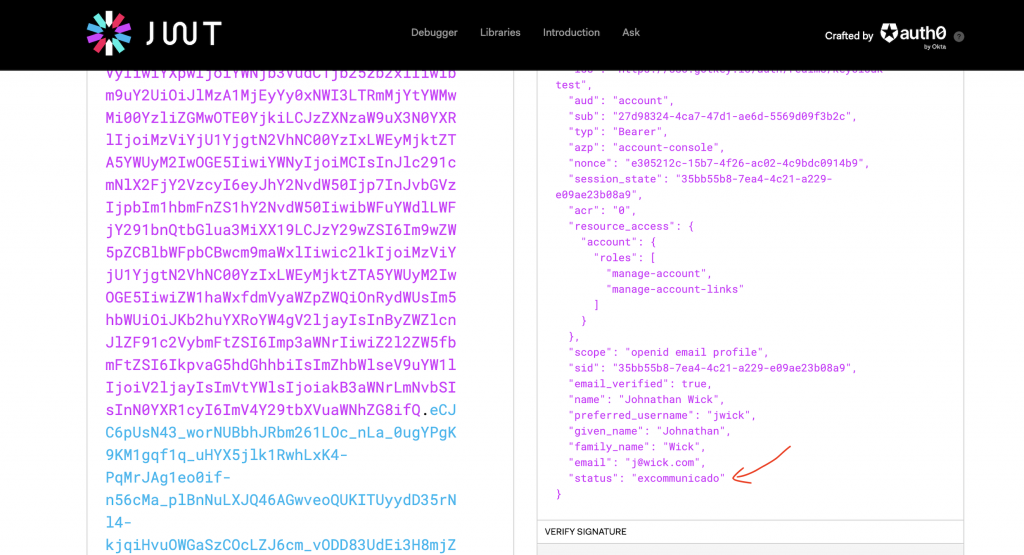
Now, if you paste that token into jwt.io debugger, you will see the new values added there:
Conclusion
In this post, I’ve shown you how to add claims to Keycloak’s access token from the user’s attributes. You can mark the value as multivalued to wrap it in a JSON array (depending on your use case). This post shows just one simple use case. From the available options, you can configure to make a claim much more flexible.

I build softwares that solve problems. I also love writing/documenting things I learn/want to learn.
Youve saved my life with this
Ive been searching for days